For today's quilling we will make your basic open coil Christmas tree. This is a staple that everyone should know how to make because it is so simple and quick to make that if you needed to make a quick Christmas card in a pinch, this is probably what you put on it.
I decided that green Christmas trees are overrated, so today we will make some neat red trees.
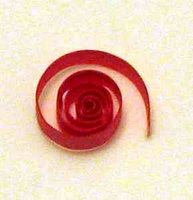
The tree itself is made with 10 open coils. You make the open coil by winding your paper and then releasing it when you get to the end of the strip. It is an open coil because you do not glue the end. This is a picture so that you can see what it looks like.
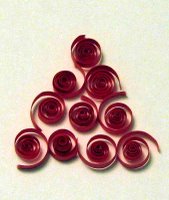
I like working with 3 inch (7.62 cm) strips. The reality is that you can use any size strip you would like. You can make the tree smaller or larger by changing the strip length or by adding more rows of open coils. In the basic design I am sharing with you today, I selected a 4 row tree with the following:
- Row 1 (top) - 1 open coil
- Row 2 - 2 open coils
- Row 3 - 4 open coils
- Row 4 (bottom) - 5 open coils
You simply add one more coil than the previous row for each new row you add. Here is a picture of the basic tree.
In this first tree that I made, you will see that I tore the ends. Although this is perfectly acceptable, I find that when using open coils I like a more clean look. You will see in the additional pictures, I have created trees where I have cut the end at an angle.
The two additional trees that I have included, have some finishing touches added to them.
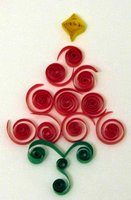
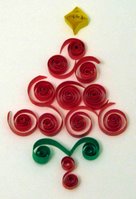
You will see that I started with the Open Coil Christmas Tree instructions above. To this tree I have added the following:
- 1 - Diamond Star - 3 inch (7.62 cm) Diamond
- 1 - 3 inch (7.62 cm) V-Scroll
- 1 - 3 inch (7.62 cm) S-Scroll
For those of you visiting for the first time, you can find the instructions for the Coil and Scroll shapes by clicking the links.
Here is a picture of the Christmas Tree I added to my Christmas cards last year.
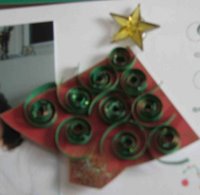
A word of advice. The open scrolls are quite delicate when mailing. The open end will get squished unless you carefully package it. This is why I usually hand deliver my quilled cards, but on those occasions I have to mail them this is what I try to do. I buy a padded envelope (or use bubble wrap). I take 2 pieces of cardboard, one for the top and bottom to stabilize the card so it doesn't bend in the mail. I then will make at least 4 tight coils. It is important that the width of these tight coils is bigger than the height of your quilled piece. I then place one piece of cardboard on the back of the card. For the piece on the front, I glue the tight coils to the other piece of cardboard, taking care to align it so that it does not touch my quilled design. I then place this in the envelope and mail it. I take this special care particularly if I have made something that is more delicate, like these open coils or fringed flowers.
Have fun with this, and remember to experiment!
Technorati Tags: quilling, paper filigree, filigrana, free quilling pattern, christmas quilling, free pattern, naqg, childrens crafts, quilled Christmas tree
Enjoy!
nice one..
ReplyDeletevisit my first try for quilling http://serysuryani.blogspot.com/2011/08/berjaya-pos-kad-rayayeay.html