Quilling Tabs

Friday, July 13, 2007

Free Quilled Pink Flamingo Pattern

quilled pink flamingo


This sweet little lady is hanging out waiting to bring a smile to your face. She is made out of folded roses instead of regular quilled shapes.


Pink Flamingo Body:


  • 6 - 6 in (15.2 cm) pink folded roses


  • Notice that the body is slightly rounded. There are a few ways to accomplish this.


  • Take a large glue dot, and place the pink roses on top of and around the glue dot OR


  • Take 3 - 4 in (10.2 cm) pink tight rolls/coils, and place the pink roses on top of the rolls OR


  • Instead of a glue dot use a dab of silicon or rubber cement OR


  • Glue the roses themselves together such that they form the rounded state


  • The choice is yours


Pink Flamingo Head and Neck:


  • 1 - 6 in (15.2 cm) pink folded rose for the head


  • 1 - 6 in (15.2 cm) black teardrop - note flatten one side so that the rounded part gives the shape a more "beak-like" look


  • 1 - 4 in (10.2 cm) pink strip that has been shaped into an "S" shape. This was done by conditioning the strip. Take the needle tool or fingernail and run it along the strip to make the strip curl in opposite directions to make an "S" shape.


  • To attach the neck, glue the top of the "S" to the rose that will be the head


  • Attach the bottom of the "S" and glue it to the body


  • Add a pearl for the eye


  • 2 - 1.5 in (3.8 cm) strips for her legs


TIP: Arrange the shapes to create a natural looking neck and bird.


This little lady is mounted on a magnet, the size of a business card. The photograph is one that I took at a local reservoir. I thought it looked like a place flamingos might hang out. If interested in the photograph, let me know.


As my friend Lynn suggested you can use this same pattern/idea for a stork or an egret and possibly even an ostrich or some similar type bird. Change the colors and the background and you can create anything you like.


Sunburst Flower with Ladybug


One of the great things about quilling is that you can combine your quilled items to make an even more spectacular arrangement. Here is an example of combining two elements. You can click to get the instructions for how to make each of the elements:


Change the colors and see how much you can do and how quickly you can become enchanted with your creations.


Thursday, July 12, 2007

Quilling Shape - Grape Roll


The Grape Roll is based on the Tight Coil/Tight Roll/Peg shape.


I will repeat those instructions here briefly, select the link above if you require more information.


  • Take the quilling strip and begin rolling it, keeping the paper tight and a nice even tension.

  • Keep the edges straight so that a belly or tornado effect is not created.

  • Carefully pull the paper off the tool and glue the end. Keeping the tight shape.

  • After the glue has dried, gently push the center of the coil outward.

  • Refer to the picture for reference.

  • Various items can be used to push the center out. A pencil, pen cap, your fingers. The key is to keep the shape as even as possible.
Here is a link to the Free Shape Instructions that I have posted.
Here is a link to the Free Quilling Patterns that I have posted.

Quilling Shape - Tight Roll, Coil, Peg

This shape has many names; Tight Roll, Tight Coil, Peg, etc.


This is one of the basic quilled shapes. I find that I use this a lot for the center of my flowers as well as creating a border around pictures, in addition to many other uses.


  • Begin by conditioning the quilling strip. This is done by running your fingernail or needle tool along the end of the strip. The paper will begin to curl as the fibers in the paper are broken down.

  • Place the quilling paper in the slotted tool (at the very tip of the slot) or at the tip of your needle tool.

  • Holding the paper in one hand and your tool in the other hand, begin turning your tool.

  • The paper will begin turning as the tool grabs the paper.

  • Try to keep the edges of the paper as even as possible - otherwise, you will find that your finished coil will have what I like to refer to as a little belly or a tornado effect.

  • Keep an even tension and keep the paper as tight as possible.

  • When you get to the end of the strip of paper, pull the paper off of the tool. If using the slotted tool, while holding the end tight slightly turn the slotted tool in the opposite direction so that the paper releases from the slot.

  • Carefully glue the end of the paper. Remember, just a dab of glue.
Here is a link to all of the free shape instructions that I have posted.

Saturday, July 07, 2007

Free Spreuer Patterns


To help you find the Spreuer patterns more easily, I have created this post with links to the patterns.

  • Christmas Angel - This Angel is red and green and has curly hair. She also wears her heart on her sleeve. You can use this basic pattern for so many things including a baby announcement or any religious event.
  • Christmas Cross - A sweet Christmas cross with a flower in the center. This is a traditional cross shape.
  • Easter Cross - This is a Spreuer Cross using the Patriarchal Cross design. It is augmented with delicate roses. Perfect design for Baptism, Weddings, Communions, Confirmations, Sympathy, or any religious gift or event.
  • Spreuer Christmas Tree - A simple tree decorated with christmas lights.
  • Spreuer Flower - A yellow and orange subburst spreuer flower.
I hope that you enjoy these patterns. Remember, they are free for personal use!

Enjoy!
Copyright (personal use) Antonella DeFalco

Technorati Tags: , , , , , , , ,

Free Spreuer Flower Pattern

Spreuer Flower Pattern
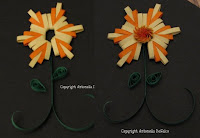
This is a neat flower I made using 2 strips of coordinating quilling strips. The pictures have instructions for each of the steps in creating the Spreuer Flower Petals.

Follow these instructions and make 6 flower petals.

Spreuer Flower Instructions
Step 1: Take 2 strips of 1.8 in (.3 cm) quilling strips. I selected Yellow and Orange for this project. I then glued the bottom of the strips together. I placed the yellow against the back of the Onion Holder Tool (refer to picture).

Step 2: Take the Yellow and go up to prong #5 and wrap the Yellow around the front and down to the starting point and glue at the bottom.

Step 3: Take the Orange and go up to prong #4, bringing it around the front and down to the starting point and glue at the bottom.

Speruer Flower Instructions
Step 4: Continue with the Orange and on the opposite side go up to prong #4, bringing it around the front and down to the starting point. Before you glue it at the bottom, cut or tear the orange near where it will be glued.

Step 5: Take the Yellow and go up to prong #3, bringing it around the front and down to the starting point and glue at the bottom.

Step 6: Continue with the Yellow and on the opposite side go up to prong #3, bringing it around the front and down to the starting point. Before you glue it at the bottom, cut or tear the Yellow near where it will be glued.

Repeat Steps 1 - 6 for each of the 6 Flower Petals.

Next, make the STEM:
  • Take an approximate 8 in (20.3 cm) length of 1/8 in (.3 cm) Green quilling strip.
  • Fold it in Half, gluing at the top where the strip is folded.
  • Take the strip and condition the ends so that they curl slightly, you can do this by running your fingernail over the end of the strip to create the curl.
  • TIP: Cut the ends at a slight angle, it makes the strip more delicate.
Finally the LEAVES:
  • 2 - 6 in (15.2 cm) 1/8 in (.3 cm) Green Teardrops
Arrange the Flower Petals into a circle (looks like the sun). Arrange the Stem and Leaves as shown in the photograph. The Fringed Flower is made with Yellow and Orange 1/4 in (.6 cm) wide quilling paper.

Enjoy!
Copyright Antonella DeFalco

Technorati Tags: ,, , , , , ,

Tuesday, July 03, 2007

Free Quilled Spinning Top

quilled spinning top


This is a fun project for the whole family... A Quilled Spinning Top!

This pattern is created using a round toothpick to wind your quilling paper around.

Take a round toothpick as your starting point.

  • Begin approximately 1 inch (2.54 cm) from the bottom

  • 1 - 48 in (121.92 cm) Blue tight roll. Glue the beginning of the strip directly to the toothpick.

  • 1 - 24 in (60.96 cm) White tight roll. Glue the beginning of the strip directly to the toothpick directly under the blue roll.

  • 1 - 12 in (30.48 cm) Red tight roll. Glue the beginning of the strip directly to the toothpick directly under the white roll.
In order to achieve the correct balance and allow your Spinning Top to spin, you must cut the toothpick to approximately 2 inches (5.08 cm) in length.


quilled spinning top
Now you can begin spinning your top!


Quilled Patriotic Ladybug


Some Patriotic posts today...

This is a patriotic ladybug who is spending some time checking out my quilled flowers. She is not your traditional red and black ladybug, she is Red, White, and Blue.

Begin by creating her body using 1/16 in (0.16 cm) wide paper


  • 1 - 48 in (121.92 cm) tight roll

  • This is the base of the ladybug.

You will add all other pieces on top of this base.


  • 1 - 3 in (7.62 cm) White, Half moon coil for the head. Place this on top of the blue body with the rounded part placed at the top.

  • 2 - 6 in (15.24 cm) Red, Teardrops for the wings. Place with the rounded side positioned just near the flat part of the head.

  • 4 - 1.5 in (3.81 cm) White, tight rolls for the ladybug's spots. Place these on top of her red wings.

Now you have a very happy ladybug. :-)

Enjoy!
Copyright Antonella DeFalco

Technorati Tags: , , , , , , ,