
I have many more Free Quilling Patterns, please click on this link.
This is a picture of a project using the fill-in technique (follow the link if you want to read more).
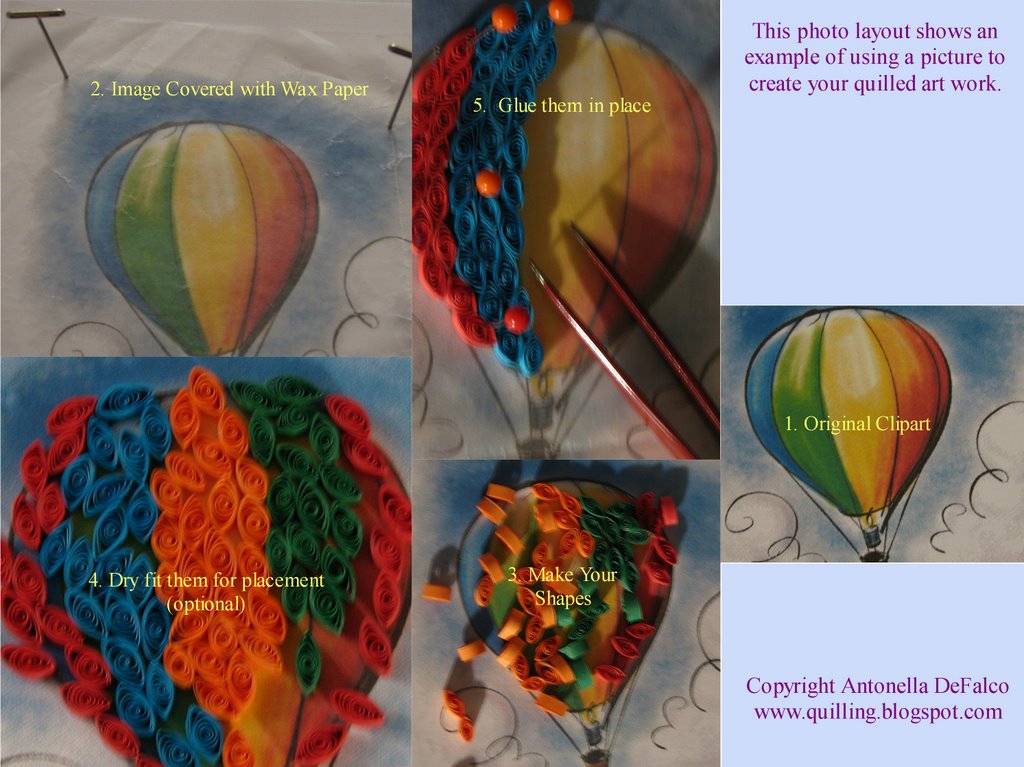
This photo collage shows each of the steps in the process. I used the marquis shape for this particular project because I felt it would give me the tightest fit and that was the look I wanted.
These are the Steps to take to create your own project:
- The process begins by selecting a picture, I found mine in Microsoft's Clip Art Gallery.
- I cover the picture with wax paper. Note: You can also use a page protector or trasparenty sheet. The key is to use something that the glue will not stick to or that you easily remove the quilled piece from.
- I used T-pins to keep the wax paper and picture from moving around. You can use tape if you want.
- I then began quilling the various colors that I wanted for this project. I used the Marquise shape here because the marquise shapes fit together nice and tight in this type of project.
- After quilling the shapes, I loosefit the quilled pieces to make sure that I have enough pieces. Make sure to quill a few extras of each color, when you glue them, they will fit together more tightly so you will need more quilled pieces.
- Then you start gluing the pieces down. I use regular sewing pins in this part of the process. I will place the pins to hold in-place my quilled pieces while they are drying to help keep the piece stable and keep it from moving around.
- Finally, after everything is glued into place and is dry, carefully remove it from your backing and you are ready to place it on your finished project.
The best advice I can offer is to have fun with this process. Remember, you do not have to finish this in one day. That is one of the reasons that you use the pins... It will still be there when you return to it when you have more time. Please go to my Flickr account to see more pictures of this project.
Enjoy!
Copyright Antonella DeFalco
Technorati Tags: quilling, paper filigree, filigrana, free quilling pattern, fill-in technique, free pattern, naqg, childrens crafts, quilled hot air balloon

3 comments:
I love this project, so colorful and cheerful! Thanks for sharing. hugs xo
Thanks Molly - I love trying new things and this was something I tried early on... I love the way it looks with the picture behind it because the colors reflect behind the quills. Hugs, antonella :-)
I wonder if there should have been a few more photos, or numbered steps. I guess there is a copy of the original image that will have the pins go through, and after finishing gluing all quilling together on the wax or page protector, remove it because it's all together and put it on that same image, or "finished project" is something else without the background, such as a card?
Anyhow, thank you for the guide!
Post a Comment