banner


Monday, December 21, 2009

Snowman Card and Some Fun at Work

quilling quilled snowman card pattern


Aren't these snowmen cards cute? We did something called a "Service Auction" at work. All of the managers had to offer something for bid by the employees as a way to raise money for the employee association.


My service offering was a Quilling Class. I had very little time to come up with my project, but I knew it had to include quilling. So I quickly created a snowman card and offered the class that they dubbed "Artful with Antonella" (cute, I think I will need to remember this one).


There were 2 "winners" Jaya and Prathibha. Jaya later told me that there were people who had asked her about quilling and what it was and she said that she told them a little, but was careful not to let on too much lest they outbid her - lol.


We used the card I created as our inspiration and the cards they created are truly their own.


quilling quilled snowman card pattern

I precut the template for the easel card using the pattern you can find on the Craftiblog (great site, I just added a link to her blog on my blogroll too).


In preparation for the class I also pre-cut paper accents and hand punched snowflakes and such so that these steps would not take up too much time. As you can see, we had so much fun stamping we didn't end up using the punches.


We sat down in the breakroom and began our class. I had selected a snowman because of the winter weather and thought we could complete the card within an hour. We ended up about 1-1/2 hours to make the cards and lots of fun by all.


I don't buy that many stamp pads, but when I do I try to find interesting ones. I selected these Tsukineko Brilliance inkpads because they actually have a shimmer to them. If you click on the pictures you can see the shimmer in the photographs.


This is a basic 2 ball Snowman pattern:


Head: 2 strips of paper, to make a Tight Roll


Body: 3 strips of paper, to make a Tight Roll


Gently push out the center of the roll to make a rounded head and body. Add Glue to the inside (bottom) of the snowman and let the glue dry.


If you notice, Prathibha added a blue strip as her second strip in the body of her snowman. You too can add some color to your snowman by replacing the 2nd white strip with the color of your choice. You can also create a snowman that is not white at all, the choice is yours, have some fun with this.


We then added an Orange triangle for his nose (I like to add the nose first and cover the center of the roll so you don't see the hole)


Googly eyes were added, because they are just too much fun - even if they sometimes give your snowman a bit of a cross eyed look - lol


3 Black crystals were added for his buttons


A piece of ribbon was cut and artisitically tied to keep him warm.


Finally his tophat was added


One of the tophats was made by cutting a strip of black paper and rolling it around your pinky and gluing it to a circular base (note: I used a hole punch to punch a hole in the circle so that the hat would perch dashingly on his head).


The other tophat used a single strip of black paper, and Prathibha folded up the bottom. We cut some strategic slits so that it would go flat and there you have it.

To keep the easel cards standing, we added 3 snowballs. As you can see, they are multi colored... use your imagination. I find when placing something to keep the card standing, that I go slightly off-center and preferrably something with some height. That is why the snowballs are stacked.
I love the personality that the cards have and the beautiful colors that were used.

What do you think you will try? I know that I will be making more of these myself, can't wait to see what they look like. :-)

Friday, December 18, 2009

Free Quilled Wreath Pattern

free quilling quilled wreath pattern
I love putting up wreaths, don't you? This wreath serves double duty as an ornament too.


For this pattern, I used my quilling to embellish punched items.


I took my 2 and 1-1/2 inch circle punches to create the actual wreath.


Next I punched leaves from various green papers. I arranged the leaves so that the covered the entire wreath.


Punch a small hole in what will be the top of your wreath and put a jump ring through it. This will be where you will attach the ribbon for your ornament. I find it easier to put it in before I add the remaining embellishments.


Make approximately 20 - 3 inch (7.6 cm) Green Shaped Teardrops


This is the fun part, arrange them on the card. For this card I made the following arrangements:


Group 3 spiral roses at the top and place about 5 - 6 green teardrops between and around the spiral roses.


Group 3 spiral roses at the bottom and place approximately 3 green teardrops between the spiral roses.


Add 1 spiral rose with 2 green teardrops to the middle left of the wreath.


Add 2 spiral roses with 3 green teardrops to the middle right of the wreath.


I added a few green spirals for good measure and there you have a beautiful wreath. This wreath is perfect for Christmas in greens and reds. It is the perfect addition to a card with a bonus ornament gift for friends and family.
For some added interest, make your card look like a door so that it appears that the wreath is hanging outside on your door.


Why not give it a try?


Wednesday, December 16, 2009

Spiral Rose Instructions


Spiral Roses are a lot of fun to make, I have added them to many projects through the years and thought you'd like to make some too.

They are actually quite simple to make.

Punch or cut a 1/2 inch (1.3 cm) circle.

Cut the circle into a Spiral shape.

Refer to the picture to see the spiral in black and the shape as it looks after it is cut.

Start at one end and roll toward the center. I prefer to use my slotted tool as I find it grabs the paper a little easier to start. Glue the end.

Punch or cut a small circle and glue the spiral rose to this smaller circle.

That is all there is to it, you now have your Spiral Rose.


Sunday, December 13, 2009

Free Quilled Snowflake Ornament Pattern

It is that time of the year... the cold weather has rolled in, we have had 2 winter storms and I have gotten stuck in the snow already and it is only December... lol

quilled quilling red snowflake ornament


I hope you enjoy this Red and White snowflake ornament. This is a 6-pointed snowflake for you to enjoy.


1 - 12 in (30.5 cm) White Tight Roll. This is for the center of the ornament.


6 - 2 in (5 cm) Red Tight Rolls. They will go all around the center white tight roll.


6 - 6 in (15.2 cm) White Teardrops. Glue the point of the teardrop between the 2 inch red tight rolls.


6 - 4 in (10.2 cm) Red Tight Rolls. Glue to the rounded white teardrop.


6 - 6 in (15.2 cm) White Teardrops. Glue the rounded part of the teardrop to the red tight rolls.


Add a jump ring to one of the points with a ribbon to hang from the tree.

Once the ribbon is attached you can enjoy the movement of the snowflake on a variety of places. You can add this ornament to a card and turn your card into a gift as well. If you are working on a winter scrapbook page, you can make one of these to adorn your page.


Or you can just hang it from your tree!

Enjoy!
Copyright for Personal Use Antonella DeFalco

Technorati Tags: , , , , , , ,

Saturday, December 12, 2009

XEROX Supports the Troops

I wanted to share this with everyone and give you a chance to brighten someone's day by saying "Thanks".

Xerox has setup a special website called LetsSayThanks.com

What an awesome idea, you get to send a postcard to the troops for free. They have a bunch of Thank You cards that you can pick from. You pick the one that you like best and Xerox will print it and send it to a soldier that is currently serving in Iraq.

So come and do something nice and say Thanks. As my friend Sue who sent me the link wrote:
"How AMAZING it would be if we could get everyone we know to send one!!! It is FREE and it only takes a second. Wouldn't it be wonderful if the soldiers received a bunch of these? Whether you are for or against the war, our soldiers over there need to know that we support them."

After you have sent your card, take a look around the site. The really touching part for me was reading the "Messages from the Toops" it goes to show just how much this simple act means to them.

I hope you'll send a card!

Thank you!
Antonella :-)

Technorati Tags: ,

Sunday, November 15, 2009

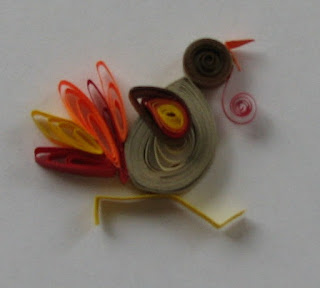
Free Quilled Turkey Project

free quilled turkey


For those of you who have young children, you will appreciate the family turkey project we had to complete.

Each family was given a photocopied turkey to cut out and decorate. Each turkey will be given an award and posted in school on the bulletin board for the class. Every family member was asked to contribute to the project, and we were encouraged to look for things to add to our turkey.

The base of our turkey was colored with crayons. Much thought went into the color selection and what a beauty he is. We kept the "decorations" to a minimum, sticking to a collection of stickers. Daddy added some orange peel and we added some texture by cutting the webbing on our clementine crate and adding it to his belly. The final addition was Mommy's quilled turkey (I love any opportunity to share quilling with everyone).

Please find the instructions for the Turkey Pattern here:


free quilling turkey

Body:
  • 2 strips of brown
  • 1/2 strip of cream
  • I let my strips overlap so that there is very little cream showing only in the center
  • Make a teardrop shape
Head:
  • 12 in (30.5 cm) tight coil
  • Cut small triangle for beak
  • Approximately 1 in (2.5 cm) of 1/16 in ( cm) wide paper for the red wattle (this is the part that hangs down from the beak)
Tail Feathers:
  • 6 in (15.2 cm) Alternate side looping in various fall colors
  • Attach to bottom of teardrop
Wing:
  • 4 in (10.2 cm) Yellow, 6 in (15.2 cm) Red, and 12 in (30.5 cm) Brown strips - glue them end-to-end and make a shaped teardrop
  • Attach to center of body
Feet:
  • Scrap of Yellow
Looks like he is running away - do you think he's worried about Thanksgiving?

I hope you have fun with this little fellow. Here are some ideas:

  • Make a Thanksgiving card with him holding a sign that says "Eat Tofu" or "Eat Pork, the other white meat"
  • Add him to your Thanksgiving scrapbook page as an embellishment
  • Add him to a framed photograph of your thanksgiving feast
The possibilities are endless... I'd love to see what you can do...
If you use this guy, please post a comment here with a link to your post so that everyone can find your project too :-)

quilled quilling turkey thanksgiving

Enjoy!
Copyright for Personal Use Antonella DeFalco

Technorati Tags: , , , , , , , , ,

Sunday, October 18, 2009

Quilling Conference in 2010

Many of you who follow my blog are quillers, so I wanted to take a moment to mention that there will be a Quilling Conference in 2010. There is an annual quilling conference that is open to quillers and quilling enthusiasts around the world.

Here are some snippets from the North American Quilling Guild (http://www.naqg.org/) website:

The NAQGCON, formerly Annual General Meeting (AGM) is a wonderful opportunity to meet other quillers, see their work and learn new techniques and applications for quilling...we have held an Annual General Meeting (AGM) each year since. In 2008 it was decided that the name should change to North American Quilling Guild Conference (NAQGCON) to let everyone know that this event is for everything quilling; sharing, teaching, learning, and most importantly enjoying.

In 2010 the NAQGCON will be held Friday, April 30th through Sunday, May 2nd at the Holiday Inn Ronkonkoma on Long Island New York, near the McArthur Airport.

Go here for forms and additional information for this fun event.

Since I live sort of within driving distance to this event I am going to make an effort to attend.. I so wanted to attend the event this year but there were situations outside of my control, I am hoping for a better turn of events in 2010.

I hope to see you there :-)

Hugs and Happy Quilling!
Antonella :-)

Technorati Tags: , , ,

Monday, June 15, 2009

Fathers Day Sailboat Card


Father's Day cards are always a challenge for me. I think this is because I struggle with those "male themes". A safe design is boats or sailboats, so this Father's Day card uses the sailboat theme.


My goal was to create a card that was easy to make. I started by doing a search for clipart, and looked for a sailboat. Once I picked the one I wanted, I printed it along with "Happy Father's Day" directly onto the card.


Now, the only thing left to do was add quilled embellishments.


For the Quilling I did the following

Clouds


  • 1 - 4 in (10.2 cm) S-Scroll cloud

  • 2 - 3 in (7.6 cm) C-Scrolls to make a cloud.

Birds


  • 3 - 2 in (5.1 cm) strips folded in half

  • Use 1/16th in wide paper.

Waves


  • 2 - 6 in (15.2 cm) Sculpted Loose Coils

  • 1 - 3 in (7.6 cm) Sculpted Loose Coil

  • 1 - 3 in (7.6 cm) S-Scroll

  • Place these underneath the sailboat to add the look of water / waves.

Sails


  • Take multiple colored strips and create Triangle Coil.

  • Make one larger for the outer sail that is blowing in the wind.

  • Create a 6 in (15.2 cm) Triangle for the flag at the top of the mast and there you have it.

A simple card, using few quilled embellishments that add to the overall look of your card.


I hope you enjoy making this card.

Have fun and Enjoy!
Copyright for Personal Use Antonella DeFalco

Technorati Tags: , , , , , , , , ,

Thursday, June 11, 2009

Father's Day Golf Card


This is a great Father's Day card for the golfer in your life.

The "19th Hole" idea is not new, I am certain that if you look around you will see many variations.

This card has very few quilled elements, and is predominantly made with torn paper.

I picked 4 different green papers. Make sure that 2 of them are a solid color and 2 have a design, pattern, or texture. This is simply to give the card a nice texture.

I cut the papers so they were the width of the card and then tore them so that there was variation across the top.

For the Quilling I did the following

Golf Ball

  • 8 - 3 in (7.6 cm) white Loose Coils
  • Glue them together, start with one in the center and then place/glue the remaining 7 around the center coil.
  • When finished take a strip of white and wrap it around the golf ball.

Pin (Hole Marker)

  • Cut a piece of paper for the "flag"
  • Create a 4 in (10.2 cm) Spiral for the pole
  • Glue the flag to the pole
  • Add "19th" to mark the 19th hole

I layered the green papers, placed the golf ball on the 1st layer, leaving the second layer loose at the top so that the ball slides in.

I placed the "pin" between the 2nd and 3rd layer

Finally, added dimensional tape to the 4th layer.

Add a "Happy Father's Day" and you have an easy card.

Note to self: If I were to do this card again, I would make sure that I had a blue background to add that little extra pizzaz.

I hope you enjoy making this card.

Have fun and Enjoy!
Copyright for Personal Use Antonella DeFalco

Technorati Tags: , , , , , , , , ,

Wednesday, May 20, 2009

Free Love Bird Pattern

quilling quilled love birds paper filigree filigrana

Here are two love birds enjoying a kiss on a red, white, and blue tree branch. They are posted in preparation for Memorial Day - may we all remember. I hope you enjoy this little treat:

Love Bird #1

  • Head - 1 inch (2.5 cm) White + 6 inch (15.2 cm) Blue roll into Tight Roll and glue
  • Body - 12 inch (30.4 cm) Red roll into Shaped Teardrop, glue to head
  • Wing - 4 inch (10.2 cm) White Teardrop, glue to body
  • Tail - 4 inch (10.2 cm) Blue Alternate side looping - loop to make center, then add loop to each side, glue at bottom (see photo), glue to body
  • Beak - .5 inch (1.3 cm) Red, cut to point at both ends, fold and glue to head

Love Bird #2

  • Head - 1 inch (2.5 cm) White + 6 inch (15.2 cm) Red roll into Tight Roll and glue
  • Body - 12 inch (30.4 cm) Blue roll into Shaped Teardrop, glue to head
  • Wing - 4 inch (10.2 cm) White Teardrop, glue to body
  • Tail - 4 inch (10.2 cm) Red Alternate side looping - loop to make center, then add loop to each side, glue at bottom (see photo), glue to body
  • Beak - .5 inch (1.3 cm) Blue, cut to point at both ends, fold and glue to head

Tree Branch


  • 3 Red - 4 inch (10.2 cm) C-Scroll

  • 3 White - 4 inch (10.2 cm) C-Scroll

  • 3 Blue - 4 inch (10.2 cm) C-Scroll

    Arrange alternating red, white, blue (see photo for placement)
    Glue birds to Tree Branch

Enjoy!
Copyright for Personal Use Antonella DeFalco

Technorati Tags: , , , , , , ,

Tuesday, May 05, 2009

Mothers' Day Book

Hello Everyone,

This is a quick post about a woman I "met" during the One World One Heart event this year. Her name is Barbara, http://blog.barbaracagle.com, and she has written a book about her Mom. The book is called 16 X Mom (in reference to her mother having 16 children - WOW). Her blog is fun to read and she looks like it would be a lot of fun to hang out with her.

You can check out her blog and enter for a chance to win her book for Mother's Day - but hurry, time is running out. Best wishes!

Enjoy!
Antonella :-)

Monday, April 27, 2009

Free Quilling Pattern Pink Flamingo

quilling quilled pink flamingo paper filigree filigrana
When I think ofFlorida, I cannot help but think of Pink Flamingos. This is probably a throwback to the 70s and 80s - as it is the stereotypical lawn ornament isn't it?

So, in honor of my proposed trip to Florida for the 2009 NAQGCON Quilling Conference I am going to share with you a really cute, quick Pink Flamingo and show you how you can think outside the box.

For this cutie, I found clipart under the Microsoft free clipart - do a search for pink falmingo and you will find it. I kept the flamingo's legs and the water she is standing in but did not keep the body because I wanted to replace it with my quilling.

Place the clipart on the page as you would like to see it printed and then resize the clipart to fit your project. Note: To remove the body, you can insert the clipart into an MS-Word document or a PowerPoint document and then create a drawing object (a square) that is white (not clear) and place the white drawing object over the flamingo's body. This will cause the body to dissappear. :-)

I printed this on a 3-1/2 x 5 inch card blank.

Then, I did some real simple quilled shapes

The Body:


  • Take 2 - 3 full length strips of pink quilling strips and roll them into a teardrop shape.

  • Pinch the end of the loose coil ever so gently so that the body looks a bit more like a fish than a teardrop.
The Head:


  • 1 - 6 in (15.2 cm) Pink Teardrop

  • 1 - 2 in (5.1 cm) Pink Teardrop

  • 1 - 4 in (10.2 cm) Black Flat Teardrop - look at the picture, this is more flat and shaped to look like a beak than a teardrop

  • Arrange as shown in the picture

The Neck:


  • 1 - 4 in (10.2 cm) strip of Pink

  • I gently arranged this in an "S" shape from the head to the body to create the graceful neck.
Accent pieces and Embellishments:


  • 2 - 2 in (5.1 cm) strips bent in half and lightly curled to make birds

  • 1 - 12 in (30.4 cm) Loose coil

  • 6 - 3 in (7.6 cm) spirals to place around the sun to create the sun's rays
This lucky lady was used on a Birthday card. :-)

Use the picture for guidance

So, remember to look around at all the things you see and do and find the inspiration all around you.

Enjoy!
Copyright for Personal Use Antonella DeFalco

Technorati Tags: , , , , , , , ,

Tuesday, April 21, 2009

Free Quilling Pattern Mother's Day Card

quilling quilled mothers day paper filigree filigrana

This is a variation of the card I made for you yesterday, just click this link if you want to see that card.

This is the same thought, a Mother's love is unconditional, this is a sweet way to commemorate that love.

I started with a white card blank (the size of the card is up to you - depends on what you have at hand)

The scrapbooker in me added some torn green strips of paper to get the look of grass with paper. I added a "Happy Mother's Day" printed on a piece of scrap paper.

I wrote in as neat a flowing cursive hand that I could the following words:

Love Unconditional Mom

I wrote them so that they were growing along the long side of the card (these are the stems of my flowers)

I then created flowers frowing from the top of these stems

The Love flower

  • 8 - 3 in (7.6 cm) Tight rolls arranged along the stem
  • I placed a pearl at the top of the flower

The Unconditional flower

  • 5 - 6 in (15.2 cm) Teardrops arranged with the rounded end in the center

  • A small "crystal" or "gem" was placed in the center of the flower

The MOM flower

  • 3 - 4 in (10.2 cm) Teardrops
  • Placed a pearl for the center of the flower

I found these cute heart shaped crystals and added one to the card

What garden would be complete without a butterfly?
Head and Body

  • 1 - 6 in (15.2 cm) Teardrop

  • 1 - 3 in (7.6 cm) Loose Coil for the head

  • 1 - .5 in (1.3 cm) strip cut in half 3/4 of the way down the strip. Glue the end that was not cut to the head and curl the cut ends to create the antennae

Large Wing (create 2 of these)

  • 3 in (7.6 cm) white strip glued to a 6 in ( cm) Red strip

  • Roll your coil so that the white is in the center, create a Teardrop shape

Small Wing (create 2 of these)

  • 2 in (5.1 cm) White strip glued to 3 in (7.6 cm) Red strip
  • Roll your coil so that the white is in the center, create a Teardrop shape
Glue one pair of wings to the body and the second pair of wings on top for the added dimension

Use the picture for guidance and placement

Have Fun!

Enjoy!
Copyright for Personal Use Antonella DeFalco

Technorati Tags: , , , , , , , ,

Monday, April 20, 2009

Free Quilling Pattern Mother's Day Card

quilling quilled mothers day card paper filigree filigrana
Whenever I think of Mom's I think about how we love unconditionally. So this card is a way to commemorate that love.

I started with a white card blank (the size of the card is up to you - depends on what you have at hand)

I wrote in as neat a flowing cursive hand that I could the following words:

Love
Unconditional
Mom

I wrote them so that they were growing along the long side of the card (these are the stems of my flowers)

I then created flowers frowing from the top of these stems

The Love flower


  • 4 - 4 in (10.2 cm) Loose Coils

  • 2 - 4 in (10.2 cm) Teardrops (for the leaves)

  • I accented the flower with a "crystal" / "gem"

The Unconditional flower


  • 9 - 3 in (7.6 cm) Teardrops arranged along the stem

  • 1 - 4 in (10.2 cm) Tight Roll placed at the top

  • 2 small "crystals" or "gems" were used to dot the "I's"

The MOM flower


  • 3 - 4 in (7.6 cm) Teardrops

  • Accented with a "crsytal" or "gem"

  • 2 - 4 in (10.2 cm) Teardrops (for the leaves)

  • Round, red crystal or gem for the "O" in Mom

What garden would be complete without a butterfly?
Head and Body


  • 1 - 4 in (10.2 cm) Marquise

  • 1 - 2 in (5 cm) white strip with just a tiny strip of black glued to the end. The tight roll is coiled so that the black is in the center like an eye

  • 1 - .5 in (1.3 cm) strip cut in half 3/4 of the way down the strip. Glue the end that was not cut to the head and curl the cut ends to create the antennae

Large Wing


  • 3 in (7.6 cm) strip glued to a 3 in (7.6 cm) White strip glued to a 4 in (10.2 cm) strip

  • Roll your coil so that the 4 in (10.2 cm) end is rolled last

Small Wing:


  • 4 in (10.2 cm) Teardrop

Arrange as shown

Add some dashes to show the path your little butterfly flew
Add a bright, cheerful sun in the corner and some grass

Have Fun!

Enjoy!
Copyright for Personal Use Antonella DeFalco

Technorati Tags: , , , , , , , ,

Wednesday, March 18, 2009

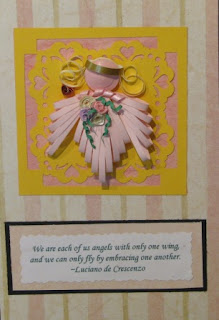
Free Quilling Pattern Angel

This quilled Angel is very sweet isn't she? She is made using the Spreuer or Onion Holder technique and floats on her very "springtime" colors.
quilling quilled angel spreuer

You can follow these instructions to make her for your very own!

>quilling quilled angel spreuerHead:

2 strips of Pink paper, tight roll
Shape the tight roll by gently pushing center up

Hair (look at closeup to see how hair looks glued and curled):

1 – 6 in (7.6 cm) strip yellow
Glue yellow strip to top of head. Make 2 cuts and curl to give Angel 3 curly Q’s.

Halo:

1 – 3 in (7.6 cm) strip gold for the halo
Glue to back

For Both the Body and Wings, you will use the Spreuer Technique (click link for more information)

General instructions are to Start in the center and wrap your strip to the left then to the right. Continually going back and forth.


quilling quilled angel spreuer
Body (Make 1, look at picture):

Start at 9 – 8L – 8R – 7L – 7R – 6L – 6R – 5L – 5R

Wings (Make 2, look at picture):

Start at 7 – 6L – 5L – 4L – 3L

Embellishments:

I gave her a collar that is made from approximately 1.5 in (3.8 cm) Spiral
She also has a bouquet of flowers with some flourish of green

I placed her on a 3 in x 3 in (7.6 cm x 7.6 cm) square that I punched using a Fiskars Border punch (I loved the punch, but I was so disappointed when the punch broke)

The Quote is from Luciano de Crescenzo:

"We are each of us angels with only one wing,
and we can only fly by embracing one another"


Final Thank You - One World One Heart

I am sending out one final Thank You regarding the 2009 One World, One Heart

Special Thank you to Nancy (All Pulped Out) for the beautiful card she made and sent out. She gets so many special KUDOS because I think she made a card for everyone who commented on her post. Now this is something to think about, and I can only imagine the hours and hours that she spent. Isn't the card beautiful? and she even made her own mailing address labels to match. If you get a chance, don't forget to visit her: allpulpedout.blogspot.com

owoh one world one heart

And I wanted to Thank the winners of my snowflakes... they were all so sweet with their comments... and I am pleased to say that all the snowflakes arrived safely (and one took a transatlantic flight to get there - lol)

Grandma Betty , Dajon (Dajon Designs) , Marie (Gave That)


These are the little beauties... 2 green and one tourquoise!
quilled quilling snowflake

Enjoy!
Antonella :-)

Technorati Tags: , , , ,

Tuesday, March 17, 2009

Happy St Patrick's Day


Happy St. Patrick's Day Everyone!!!

St. Patrick's day is a day filled with the "luck of the Irish" and much green. Saint Patrick was the patron saint of Ireland who is credited with bringing Christianity to Ireland.

Did you notice the really cute shamrock? It was created with the loving hands of a little one - isn't it cute? On the back is this little poem:


Just like the leaves on each shamrock I see,

There are three parts to the Holy Trinity,

First is God the Father,

Then Jesus His only Son,

And the Holy Spirit

Together as One.

So, did you eat Corned Beef and Cabbage today? We did over the weekend, but not tonight. By the way, I have it on good authority that Corned Beef and Cabbage is not the traditional St. Pat's meal. Corned Beef is apparently more of an English meal, not Irish. A meal that is eaten in Ireland is boiled bacon and cabbage. Lest you forget, here is a funny poem by Frances Shilliday to help us remember:


GOOD GRIEF - NOT BEEF!

I just want to put something straight
About what should be on your plate,
If it's corned beef you're makin'
You're sadly mistaken,
That isn't what Irishmen ate.

If you ever go over the pond
You'll find it's of bacon they're fond,
All crispy and fried,
With some cabbage beside,
And a big scoop of praties beyond.

Your average Pat was a peasant
Who could not afford beef or pheasant.
On the end of his fork
Was a bit of salt pork,
As a change from potatoes 'twas pleasant.

This custom the Yanks have invented,
Is an error they've never repented,
But bacon's the stuff
That all Irishmen scoff,
With fried cabbage it is supplemented.

So please get it right this St. Paddy's.
Don't feed this old beef to your daddies.
It may be much flasher,
But a simple old rasher,
Is what you should eat with your tatties.

©Frances Shilliday 2004, please visit her website which debunks other myths including this little ditty.


Sunday, February 22, 2009

Some Quilling Friends

quilling quilled bird

Being a part of the One World One Heart giveaway was great. I got to meet so many new and interesting people.


quilling quilled valentine heart cardOne of my new blog friends is Reshmi and she has a wonderful blog. She is among many other things a quiller and has done some really beautiful quilled work. She has graciously allowed me to post some of her pictures here. Please stop by her site and check out all her wonderful tutorials and such - so much more than quilling. I will be posting more about her soon in one of my Artist Spotlight features.


Saturday, February 14, 2009

Happy Valentine's Day


Happy Valentine's Day everyone!!!


Saint Valentine's Day is a holiday celebrated arond the world today on February 14th. Sending cards and love notes is part of the tradition and part of the fun.


My favorite story about the history of Valentine's day is this one... Legend has it that there was a Roman named St. Valentine who was martyred for refusing to give up Christianity. He died on February 14th. As the legend goes, St. Valentine left a note for the jailer's daughter, and signed it "From Your Valentine" before he was to be executed.


Sappy I know, but what can I say? You want something else that is sappy? How about this sweet little card, sure to warm your heart..


Are you looking for a cute design for Valentine's Day, Mother's Day, Father's Day or just a cute design period? Well this is perfect if you have little ones in the house. Want to add just a little bit of quilling to your design? This is the pattern for you :-)


For those of us who have children, you know that many of the early art projects you receive from your children will involve stamping with their hands. These are art works to be treasured, as you surely forget how small their hands are as they get older.


We know that our children hold our hearts in their hands and this is a cute way of showing it :-)
So, if you have a small child (a neighbor's child will do) have them stamp their hand print on a piece of cardstock. This is where you cam be as creative as you wish, you can use any color you want. Just be careful to pick paints or stamps that are washable, because it can take a long time for ink to wash away (trust me, I know) :-)


  • Paint or stamp a stem and leaves for your flower, don't forget grass


  • Your paper strip length will depend on the size of the handprint


  • A good place to start is with a 12 in ( cm) strip and make your Open Heart / Scroll Heart


  • Glue this to the palm


Add whatever sentiment is appropriate, and you have a greate card and keepsake.


This is appropriate for Valentine's Day, Mother's Day, Father's Day, Anniversary, Birthday, whatever event you can think of that you want to share a little love.

Get creative - stamp multiple handprints and create a bouquet
Stamp multiple handprints and cut them out so that you can create a 3D effect with dimensional tape or glue dots
If you don't have a child's hand, there are handprint stamps out there that you can use. Since these are much smaller you can arrange them coming out of a vase


Enjoy!
Copyright for Personal Use Antonella DeFalco

Technorati Tags: , , , , , , , , ,

Thursday, February 12, 2009

Winners! 2009 One World One Heart

This has been so much fun. I am only sorry that I was not able to visit everyone participating. I am amazed by all the people who were able to visit all of the hundreds of participants.

So, what everyone has been waiting for...

The WINNERS are:


Grandma Betty

Dajon (Dajon Designs)

Marie (Gave That)


Congratulations to each of you! I will make them this weekend. I will contact each of you for your mailing information and to see if you have a special color request.


Thank you to everyone who participated and made this such a fun and wonderful event!


Don't forget to make plans for next year's event!!!


Enjoy!
Antonella :-)


Technorati Tags: , , , ,

Wednesday, February 11, 2009

2009 One World One Heart Giveaway

Photo

Update: The 2009 One World One Heart Giveaway Event is over - sad, but true :-(

Please check out my post to see who the winners are :-)

This is my second year participating in this event and it is so much fun!


What is the One World One Heart Giveaway? It is a blog-wide event where people like you, from around the world vist participating blogs for a chance to meet new friends and win something. Lisa Swifka is the gracious host of this event, and she has listed all of the participants on this Gypsy Caravan on the sidebar of the One World One Heart blog.

There are a few simple things to keep in mind:


  • To enter my giveaway, post a comment on this post from from January 19th until February 11th


  • On your comment make sure you leave me a way to contact you. You can leave your email address or a link to your blog so I can find you.


  • On February 12th I will announce the winner on my blog and I will ask the winner to contact me with their postal mailing address so you can receive your gift.

So what can you win? How does a beautiful quilled snowflake sound? It has been very cold and snowy here so that has inspired the giveaway. As you can see, I have 3 snowflakes to giveaway so let me know if you have a color preference.

I hope you have fun visiting the blogs in this Gypsy Caravan.


Please feel free to join my blog and become a follower!


Enjoy!
Antonella :-)

Technorati Tags: , , , ,

Sunday, February 08, 2009

Free Quilled Valentine Heart Pattern


I wanted to try something that is different, yet in some cosmic way part of my everyday life. Just for you and Valentine's Day, this is an unconventional spin on the traditional heart, as inspired by a design on my bedspread (thus part of my everyday life). I actually used this on a scrapbook page.

Heart
  • 2 - 6 in ( cm) loose coil
Non-traditional Heart Shape

  • 1 - 12 in ( cm) strip Fold Strip in half

  • Curl approximately 1/2 in ( cm) of each end outward

Creating the Heart shape

  • Glue the loose coils to the strip to create the curved upper heart (you must look closely at the photo)

  • Do not glue the curled ends until you complete the next step

  • 1 - 4 in ( cm) - V-Scroll shape

  • 1 - 6 in ( cm) - V-scroll shape

  • Place the 6 in ( cm) inside the 4 in ( cm) strip and glue the ends together

  • Now glue the curled ends to the pointed end of the V-scrolls

Accent the heart

  • 1 - 4 in ( cm) teardrop

  • 1 - 3 in ( cm) teardrop1 - 2 in ( cm) tight roll

Arrange as shown

Remember, inspiration can some from anywhere, all you have to do is be open to it
I used this heart on a Christmas scrapbook page I was making

These colors would work equally well for Christmas or Valentines or your Anniversary

Enjoy!
Copyright for Personal Use Antonella DeFalco

Technorati Tags: , , , , , , , , ,

Thursday, January 01, 2009

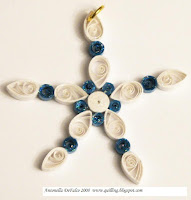
Free Quilling Snowflake Card Pattern

quilled snowflake ornament card


Here it is, the first quilling pattern of 2009! This is a quilled snowflake ornament that is attached to a card. This card doubles as an ornament for a really special treat for the recipient.

quilled snowflake ornament

Let's begin with the snowflake ornament measurements:
  • 1 - 12 inch (30.5 cm) White Tight Roll for the center of the snowflake

  • 5 - 3 inch (7.6 cm) Blue Tight Roll (will go around the center tight roll)

  • 5 - 6 inch (15.2 cm) White Teardrop (this will alternate with the blue tight roll around the center tight roll. The point of the teardrop will be glued to the center tight roll. See photo for placement)

  • 5 - 6 inch (15.2 cm) Blue Tight Roll (will be glued to the top / rounded portion of the white teardrop)

  • 5 - 6 inch (15.2 cm) White Teardrop (will be glued to the blue tight roll along the rounded end)

To make this snowflake sparkle, I used a glitter glue on both the front and back of the snowflake. I applied the glitter to one side at a time and allowed it to dry before turning it over and glittering the opposite side.

All that is left is the find a jump ring and attach it to one of your points and then tie a string to complete the ornament.

Making the Card

  • Start with Blue cardstock (this is a quarter fold size card)

  • Using various sizes of snowflake stamps, stamp snowflakes on card. I used the Tsukineko Silver which gives the card a glittering look.

  • Tear a piece of white glitter paper and attach to bottom of the card to give the appearance of snow.

  • Stamp "Merry Christmas" or "Let it Snow" or some other sentiment.

  • Apply snowflake and snowman punches (or brads if you have them) to give the card a layered look.

  • Attach the snowflake ornament from above and you are finished.

There you have it. A cute snowflake ornament and card, the winter theme can be used for any occasion during the winter months.

Happy New Year 2009

quilled snowman and birdhouse ornament

Happy New Year! Can you believe that 2008 has come and gone and today is the first day of 2009? Neither can I.

Have you made any New Year's resolutions? I don't typically make an official list or anything that I post and mark off what I've done. I am a list maker by nature, so this is just an addendum to the numerous lists that I have going at any given time.

A friend of mine, Bronwyn, posed a question about any quilling plans for 2009, here is my response:

... I didn't get to do as much quilling as I wanted in 2008, so one of my goals is to try to quill more in 2009. Here are some of my ideas for 2009:


  • I love birds, so I'd like to quill some birds. I can promise that this year I will have a Toucan and a Folk Art Bird pattern (these are pretty detailed), and a quick little peacock pattern that will be easy to pull together quickly.


  • If I can, maybe I can get one of my hummingbird ideas into a pattern (I have quilled a few different hummingbirds over the years, so it will be a matter of sitting down and writing down the instructions) and I would love to get around to quilling one of the bald eagle ideas I have (this is definitely more of a wish list at the moment).


  • Ballet Slippers for ballet recitals in our Spring-time. I made a pattern for ballet slippers a few years ago and have only made them and given them away as gifts so far. The term pattern is a bit loose, I have never written down the exact instructions, I more quill from memory. My niece is doing ballet now, so I want to make some for her (and maybe for some in her class too?)

  • Some ornaments - things like snowflakes and these little birdhouses that I did this year for Christmas that I really liked. The snowflake pattern will be the first pattern of the New Year!

  • I would like to do some pattern ideas to celebrate a First Holy Communion or Confirmation.

  • I think this year I will finally publish instructions for doing husking. I like to do husking and make up my own designs, but I would like to share a husked butterfly (actually, I use some husking in some of my hummingbird designs so this will be a good idea). Husking will then round out most of the different types of quilling that people do.

  • Roses - I can't believe I forgot about roses. When I first started quilling, I did a lot of these flowers that I called a wild rose. I have been using them a lot lately, so I will share those as well as instructions for the folded rose.

For those of you who will be, or plan to be in the Tampa, Florida area on May 1 - 3, 2009 perhaps you can join in the North American Quilling Guild's Quilling Conference (NAQGCON)? This is a great time if you can make it. I am planning to attend and teach a class with a friend of mine, Marion (she is going to teach Iris Folding and I am going to teach a folded rose pattern to accompany her design).

Feel free to share in the comments your resolutions or thoughts or suggestions about things you would like me to try to get to in 2009.


quilled snowflake ornament

Hugs and Happy Quilling!
Antonella :-)


LinkWithin

Related Posts with Thumbnails