Tea Bag folding - the Small Kite Fold.
When I tell you that this is the basic fold, I cannot stress to you how much this fold is used. Every site that I have ever visited or book that I have read that talks about tea bag folding will generally start with this fold. So, that is where I will start.
I want to thank Bronwyn for encouraging me to venture out a bit beyond quilling.
First, I will tell you that I was at a bit of a disadvantage when I put these instructions together. The computer I am using is not connected to a printer at the moment and I was limited with the paper I have access to, so I was in a bit of a conundrum. I mean, how can I demonstrate tea bag folding if I do not have the ability to print any of the wonderful tile patterns that you can find on the internet? I decided to take a different approach and grabbed a sheet of scrapbooking paper and cut my tiles from the paper that I had.
This of course did not address all of my issues, since the squares are not "exactly" the same design, but they are close. I have to try this more often, because I know that I can develop a sense of what papers would work out better than others.
Since the purpose of this post is to be a high-level, instructional post to walk you through the basics of tea bag folding the paper that I have selected works quite well for that purpose. I have taken pictures of the folds along the way.

I started with a 2 inch x 2 inch (5.08 cm x 5.08 cm) tile. Tiles can be any size you need, as long as they are square (although there are new designs with oval and cutout tiles, but we won't worry about them right now). Often times, the standard tile size is 1.5 inch x 1.5 inch (3.81 cm x 3.81 cm).
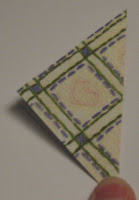
Place the tile in a diamond shape and fold it in half (looks like a trianlge on its side).
Open up the paper, place the patterned side down on your worksurface
Fold both of the sides in toward the center fold line you just created
Once both sides are folded, this is your Kite shape!
Congratulations, you did it!


If you take this shape and fold it in half again along the center line, you now have the small kite shape
Make 8 of these small kites for the project today.
See, and you thought that this was going to be difficult.
You can use low tack tape like masking tape or a repositionable tape. The idea is to have something that will hold your medallion together until you position them and can glue them together. I use masking tape, I have plenty of that around the house.
These 2 half medallions are basically the same Fan shape, the difference is in how I arranged them.

In this first picture, I have placed each subsequent small kite into the center of the previous small kite. So, where the fold is open in the center, I placed the folded edge of the small kite to the left inside. This creates a more compact fan. I like this look and it reminds me more of a ladies fan.

In this second picture, I arranged the small kites so that as I added the next small kite (to the left) I placed it on top of the previous small kites left most point (the top of the triangle). This is more the look of a fan that has been opened fully. If you made 16 of these small kites, you can complete the medallion and create a complete circle. Looks great if you wanted to add a small circular picture or a Monogrammed accent.
I hope you have enjoyed this!
Enjoy!
Copyright Antonella DeFalcoTechnorati Tags: tea bag folding, teabag folding, small kite fold, kite fold


