banner


Showing posts with label halloween. Show all posts

Friday, October 31, 2014

Fun What Your Halloween Candy Says About You


I found this graphic last year, unfortunately it was after Halloween... So, when I was pondering what to post I remembered I had this in my "stash" of Halloween ideas... I was concerned, because I couldn't remember exactly where I found it, luckily my good friend google found it for me.... here is the link: http://www.nickmom.com/more-lols/what-your-trick-or-treat-giveaways-say-about-you/

Happy Halloween!

I hope you have a wonderful day!
Antonella Quilling Art

Thursday, October 30, 2014

Free Printable and Quilled Hat and Broom


Are you enjoying this walk down memory lane and this fun printable? This is definitely one that you print with a tongue in cheek chuckle.  This year, I placed this near the front door so that you see it when you enter our home. It causes quite a few chuckles and comments, so it is definitely doing what I intended. 


Click here to download this free pdf printable


For the quilled pieces, I have the instructions for quilling those too, just click on the pictures to be taken to the instructions.


Looking for that quilled witches hat? Check out these instructions to make this quick and easy quilled witches hat by Antonella at www.quilling.blogspot.com #quilling #filigrana #free #witch #Halloween


 Looking for that quilled witches hat? Check out these instructions to make this quick and easy quilled witches hat by Antonella at www.quilling.blogspot.com #quilling #filigrana #free #witch #Halloween"


I hope you have a wonderful day!
Antonella Quilling Art

Tuesday, October 28, 2014

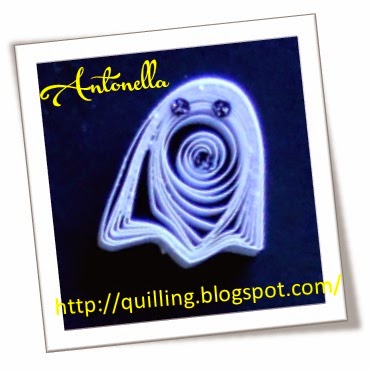
Free Quilled Ghost Pattern #tbt

Halloween is approaching, and this
Throwback Quilled Ghost is just what you need, lol


Super cute (I mean scary) quilled ghost... this free quilling pattern is shared by Antonella at www.quilling.blogspot.com #quilling #quilled #filigrana #paper-filigree #ghost #halloween
I wanted to fill this week with as many fun, last minute Halloween projects I could find.

This ghost can be as small or as big as you want him to be. The key is in how many quilling strips you use. Since I needed him to fit on this card, I only needed one strip, but you can use 2 or 3 or even more if you have a larger space to fill.

Super cute (I mean scary) quilled ghost... this free quilling pattern is shared by Antonella at www.quilling.blogspot.com #quilling #quilled #filigrana #paper-filigree #ghost #halloween

Free Quilled Ghost Pattern

  •  Take 1 strip of White quilling paper, create a loose coil (click here if you don't remember how to make a loose coil)
  • Place a dab of glue on the end, and pinch the paper where the glue was applied
  • This will make your coil look like a teardrop, but we want a ghost shape, so let's keep pinching, lol
  • Take your quilled shape and pinch the paper on either side and you will know have the ghost shape.  Tip: To make the bottom more uniform, I will squeeze the bottom together to make sure that that zig zag on the bottom has crisp folds.
  • For the eyes and mouth, I took a 1/16 inch punch and punched out his eyes and mouth, hmmmm, that doesn't sound very nice does it. I promise, this was created in only the most non-violent way... lol
 I hope you are enjoying your week and have a wonderful day!
Antonella Quilling Art

Monday, October 06, 2014

Motivation Monday Happy Birthday


I'm not certain this is really a "Motivation Monday" moment, but I wanted to share with you a fun Birthday Card I made.

What makes this card so much fun (for me) is that it has a "Halloweenie" flair, lol. I added a bat, black cat, and mummy stickers to the birthday background I made.  Don't you love to include seasonal elements to your cards?

I created the design elements with some shading so that they look like they are popping off the card, I like the way it turned out. I love elements like this because I get to play with the many different fonts I have downloaded. I mean, can you ever really have enough?


Click here for my Freebie Friday where I have shared this printable with you so that you too can create one....


I hope you have a wonderful day!
Antonella Quilling Art


Friday, October 03, 2014

Freebie Friday Say Boo and Scare On Printable

I am so glad it is Friday!!! I couldn't wait to post this freebie, it is so much fun! Don't be frightened, these are only the friendliest of ghosts, lol.


Say Boo... Scare On! Click to download the free PDF printable from Antonella


I would love to hear how you've used this printable! There is a 4x6 and a 3x5 version of each of these cuties...   


Say Boo... Scare On! Click to download the free PDF printable from Antonella


As always, I am happy to share my tutorials, freebies / printables and cut files with you, I only ask that you do the following:

  • Please leave a comment if you download  freebie / printable / digi, etc, because I would love to hear from you

  • If you enjoy the things I share with you, please become a follower so that you will see all the new stuff when it is posted (no pressure, join only if you want)

  • I hope you love PINTEREST as much as I do, would love it if you would PIN this project!
  • Please do not share any of my digital images, printables, or tutorials directly with others, but please do send them on over to me so that they can peruse and collect the images themselves.

  • I would be thrilled and honored if you would send me links to any images or posts that you've done using something that I have shared with you.  If you say it is ok, I will even feature your work here!

  • If you want to recolor the images, feel free! 

  • If you have a special request, please let me know and I will see what I can do.
Most importantly be Fantastically Creative You!

 Check out my Link Parties to see the badges of all the lovely places where I am linking to.


I hope you have a wonderful day!
Antonella Quilling Art

Monday, September 29, 2014

Motivation Monday Say Boo Scare On

Happy Fall Everyone!


Today we are taking a bit of a side trip with a fun  "Keep Calm" Halloween theme.  What is cuter than "Say Boo and Scare On"? I cannot think of anything, at least not today... lol

This will be a gift for my friend who LOVES, wait, she REALLY, REALLY, REALLY LOVES, LOVES, LOVES Halloween and everything to do with it. She starts decorating for Halloween as early as she can - this year she started the last weekend in August...

So, for each of you Halloween lovers and our friends who love Halloween.... this is for you....

Take a look farther down and you will see there are two versions I created. The one I have framed has a group of ghosts, something about them that makes me smile. The second has an adorably sweet ghost hanging out.

I would love to hear about your Halloween crazed inspired friends and if you've gotten the jump on Halloween yet?

Click here for my Freebie Friday where I have shared this printable with you so that you too can create one.  Too cute....


I hope you have a wonderful day!
Antonella Quilling Art

Thursday, October 31, 2013

Happy Halloween Pumpkin Walkabout

Unique Pumpkin Carvings Photo Collection
Halloween... Each of these pumpkins were showcased in town and were carved / decorated by the shop owners. They are so creative and fun.

So, where does the name Halloween come from, I found this information on the internet, 
Originally spelled Hallowe'en, it is a contraction of All Hallows Even, meaning the day before All Hallows Day (better known today as All Saints Day), a Catholic holiday commemorating Christian saints and martyrs observed since the early Middle Ages on November 1. (directly quoted from About.com)
I guess there is no definitive answer for how Halloween came about, but this is one thought.
Unique Pumpkin Carvings

Several sources say that it dates back to the Celts who believed that on October 31st the spirits of the dead walk the earth / come out of their tombs. They would do things to frighten the ghosts like wearing scary costumes and lighting fires. They also had lucky foods that they ate like apples and nuts.
Unique Pumpkin Carvings

Many of the things we associate with Halloween are from the Celts. Black is the color of winter and long nights and Orange is the color of the harvest. Black cats were thought to have special powers (makes me want to do something on superstitions).
Unique Pumpkin Carvings

This Celtic tradition was married with the Christian practices after the Romans invaded. In the Christian tradition, November 1st was All Saints' Day (All Hallows' Day). The mass that the Catholic Church celebrated on November 1st was the mass of all the hallowed (saintly people). So, this meant that October 31st was All Hallows' Eve which later became Halloween.
Unique Pumpkin Carvings

I hope you've enjoyed these pumpkins, I only wish all of my photos had come out, they were fun to see and the kids had a great time!

Happy Halloween!


Don't forget to grab your free copy of the My Memories scrapbooking and photo enhancement software!  Yes, I said FREE as long as you chose the download method!

From October 27th to November 3rd you can get a free copy of the My Memories software simply by using this code FreeTreatLL146 at the checkout!  This is really important, please copy and paste it since it has to look exactly like this  FreeTreatLL146  you will enter the code in the promo code field before checking out.  


I hope you have a wonderful day!
Antonella Quilling Art

Tuesday, October 29, 2013

Free Quilled Orange and Black Witches Hat and Broom


If the Broom Fits Ride It free printable project


I promised I would post the instructions for the 

Quilled Witches Hat and Broom 

I made in this fun project (please click here for the printable) where you can grab the funny quote I used in this project!


Ok, now onto the quilling!
Free Quilled Orange and Black Witches Hat Instructions

The hat begins very similarly to another witches hat I shared, check out the picture and link below!

Quilled Witches Hat:

  • 3 strips of black quilling paper - Rolled to create a teardrop shape
  • Tip: I wanted the hat to be denser, that is why I used so many strips
  • Tip: You can certainly use fewer strips if you'd like, that's the fun of making it yourself!

I wanted to incorporate orange, because I do love the way black and orange look, so I grabbed a few leftover orange strips from another project and, this is what I did:
  • Pulled off a piece and wrapped it around the teardrop
  • This was the fun part, I used these orange strips to create a more cone-like hat
  • They worked perfectly to keep that slightly off center, angled hat that I wanted to create
  • Tip: You can use accent colors and strips to create special shapes in your quilling as I've done here

Lastly,

  • 1 strip of black quilling paper to create a crescent shape for the brim of the hat
  • Glue this to the base of your hat
and there you have one quilled witches hat!
Free Quilled Witches Broom Instructions

The Broom was even easier! 

  • Cut off a 3/4 inch wide, by 3 inches long strip from a brown paper bag
  • Cut fringes into the strip along the 3 inch long side, making sure not to cut through the entire 3/4 inches
  • Roll it to create the bristles of the broom.  
  • The broom handle is a leftover piece of black paper
  • I added the black to the top because I love the contrast
  • Tip: Adding the black cover at the top is more than a decorative choice, it is also a great way to keep the broom together
Looking for another option for your witches hat? You can check out this project by clicking on the picture below or clicking this link.
 Check out this fun Quilling, Paper Filigree project. This cute witches hat with green hair from Antonella at www.quilling.blogspot.com


I hope you have a wonderful day!
Antonella Quilling Art

Saturday, October 26, 2013

Freebie If the Broom Fits Printable

If the broom fits ride it - freebie printable

It is a beautiful fall day today, a bit brisk, but comfortable with a jacket!  Last night we went to my son's "Trunk or Treat" at his school.  What is a Trunk or Treat? It is a wonderfully fun, safe way for the kids to enjoy trick or treating. Some very fun parents decorate their cars and hand out candy to the kids in the parking lot of the school.  They have a DJ and dancing, and snacks and drinks.

Freebie If the Broom Fits Ride It from Antonella 


So, with the spirit of the season I am happy to share this fun printable with you.  I created a few versions of this quote for you, you can download the pdf file below.  I printed mine on a sheet of orange card stock, I thought it would be nice to see the black against the orange.  I then quilled myself a witches hat and fringed a broom to add to the project. I also took some of my leftovers from my various Halloween projects and added a spider web and the spider who made it, lol... I picked this quote because I thought it would be funny, and I was feeling a little cheeky at the time, so  "If the Broom fits ride it"....

Freebie If the Broom Fits Ride It from Antonella
If the broom fits ride it - click to download freebie


This was inspired by a Halloween Wall Hanging project by Sandee from In the Hills of North Carolina

I loved her use of the witches hat and broom. She experimented with paints and I used my quilling to create a project that I hope you have as much fun with as me!

As always, I am happy to share my tutorials, freebies / printables (and now cut files) with you, I only ask that you do the following:
  • Please leave a comment if you download  freebie / printable / digi, etc, because I would love to hear from you
  • If you enjoy the things I share with you, please become a follower so that you will see all the new stuff when it is posted (no pressure, join only if you want)
  • Please do not share any of my digital images, printables, or tutorials directly with others, but please do send them on over to me so that they can peruse and collect the images themselves.
  • I would be thrilled and honored if you would send me links to any images or posts that you've done using something that I have shared with you.  If you say it is ok, I will even feature your work here!
  • If you want to recolor the images, feel free! 
  • If you have a special request, please let me know and I will see what I can do.
Most importantly be Fantastically Creative You!

If you recall, I recently shared instructions for making a quilled witches hat that you can find by clicking here, this project modifies that project a wee bit so please click here for the instructions to make the Hat and Broom in this project.  Today, I am sharing the freebie printable of the quote I used in this project.

Freebie If the Broom Fits Ride It from Antonella
If the broom fits ride it - freebie from Antonella :-)


I hope you have a wonderful day!
Antonella Quilling Art

Thursday, October 17, 2013

Walkabout Twig Craft Ideas Edition

What a lovely day, and today I wanted to share with you some really fun and fantastically creative Twig Projects. Yes, really, these are all made with twigs that you can find when you step outside your door or go for a walk in the park or the woods...

So let's be inspired!


=============================
My friend Ann was the one who initially got me hooked interested in these twig projects, here are a few of her creations... she is super talented, stop in and give her a shout out!


You would never believe that this is made with a twig... yes, a beautiful dragonfly adorned with the prerequisite glitter (because really, no project is complete without it, lol)


Some seasonal Halloween fun too... love this spray painted twig wreath with silhouetted Halloween figures and the super cute twig pumpkin that is lit from within!


Love this cute twig Christmas tree ornament, don't you?


How cute, love this rustic twig snowflake ornament, don't you?


What a pretty winter wreath, I may have to do a wreath edition soon because I really like all these beautiful wreaths out there


=============================

Have you done any twig projects lately or has anything here inspired you? I'd love to know!

I hope you have a wonderful day!
Antonella Quilling Art

Thursday, October 03, 2013

Walkabout Wednesday Great Fall and Halloween Printables

Every Leaf Speaks Bliss to Me quote and printable
Every Leaf Speaks Bliss to Me

Another Walkabout sharing great finds and inspiration from around the web...

Today I wanted to focus on Great Fall and Halloween Printables.  I am going to share my printable with you on my Freebie Friday post, so stay tuned....

These are some great project ideas, and freebies that I hope will inspire you!


Every Leaf Speaks Bliss to Me quote and printable
Every Leaf Speaks Bliss to Me

I hope you have a wonderful day!
Antonella Quilling Art

Saturday, September 21, 2013

A Freebie Digital Sentiment and I Was Featured Again

Free Spooky Digital Sentiment Freebie
Spooky Digital Sentiment Freebie

I am so humbled, I have been featured again, this time at The Answer is Chocolate! I am sharing the inside of the card this time and will share this cute digital sentiment with you as well...  I used some fun chipboard shapes, with glitter, and a die cut pumpkin.  The sentiment is one I created with some fun fonts that I had... The one I am sharing is similar, but I embellished it a little, lol.

Carol, from The Answer is Chocolate, shared her Happy Fall Features, and I want to share with you the wonderful projects that were featured along with mine... Speaking of Fall, is it really Fall? You'd better believe it, September 22nd is the first day of fall!

Let's get started with our host of the Happy Fall Features....


As a special Thank You, I am also sharing this fun digital sentiment with you - I sized them so they would fit in a 2x2 circle or scallop punch:
"Have a Monsterlicious Day!"


Free Spooky Digital Sentiment Freebie download
Click here to download Digital Sentiment (jpeg format)

As always, I am happy to share my tutorials, freebies / printables (and now cut files) with you, I only ask that you do the following:
  • Please leave a comment if you download  freebie / printable / digi, etc, because I would love to hear from you
  • If you enjoy the things I share with you, please become a follower so that you will see all the new stuff when it is posted (no pressure, join only if you want)
  • Please do not share any of my digital images, printables, or tutorials directly with others, but please do send them on over to me so that they can peruse and collect the images themselves.
  • I would be thrilled and honored if you would send me links to any images or posts that you've done using something that I have shared with you.  If you say it is ok, I will even feature your work here!
  • If you want to recolor the images, feel free! 
  • If you have a special request, please let me know and I will see what I can do.
Most importantly be Fantastically Creative You!


I will be linking up to these parties over the next few days, hope to see you there!

I hope you have a wonderful day!
Antonella Quilling Art

Friday, September 20, 2013

Freebie Friday Ghost Shaped Card Cut File

Antonella's Ghost Shaped Card - quilling.blogspot.com
Ghost Shaped Card


Another Fabulous Freebie Friday! Tis the season for all things Halloween, and this little fella fits right in. This little ghost will be going to a good home. I love the fact that he looks a bit surprised, I wonder if it is the spider webs and the spider crawling about?

I started with a black base, and cut the card shape.  Then I cut the ghost out on white, you will notice that there are pre-cut holes for his eyes and surprised expression.  Before I glued anything down, I placed the little guy down on the card base and used my crafting paint brush with some glossy accents to mark where the eyes and mouth were.  Then I safely moved him to the side and filled in the entire area with glossy accents and sprinkled some really pretty purple shimmer glitter over top.  You can see the shimmer, but cannot tell the color from the photo.

Antonella's Ghost Shaped Card - quilling.blogspot.com


While the glitter was drying, I ran him through my Cuttlebug, and used the Cuttlebug Spots & Dots Embossing Folder.  Oh no, do you think that's why he looks surprised? Can you see the embossing in the photo? I have started embossing some of my layers more and more lately, I love the added texture and depth it gives to my projects.  Do you like to emboss parts of your projects too?

I had some extra spider webs and a spider from another project I was working on at the same time, and by happy coincidence one of the spider webs fell on my ghost and I said, "hmmm, that might not be a bad idea" when I asked my creative consultant (my son) what he thought, he liked it! Since this is going to be his cousin's card, he gets final say, lol.  So I added the lovely spider webs and spider and then added some of this fabulous yarn (I love it because it is fun, but when I added it to the card, it kinda made him look like he had hair).  I kept the hair for the photo, but my son consultant doesn't think it works for a boy, he may be right, lol.

To finish him off I had to add some bling, so I've added some rhinestones and some sequins and he was finally ready.

What do you think about using him as a Birthday card, he can just as easily be an invitation to a Halloween party, or how about your next block party or maybe a Bunco card night out with the girls?

Antonella's Ghost Shaped Card Free Cut File - quilling.blogspot.com
Ghost shaped card studio cut file - click to download

The cut file contains the ghost shaped base and two ghost layers, one with eyes for the front and one without for the inside so that you have something to write on.

As always, I am happy to share my tutorials, freebies / printables (and now cut files) with you, I only ask that you do the following:
  • Please leave a comment if you download  freebie / printable / digi, etc, because I would love to hear from you
  • If you enjoy the things I share with you, please become a follower so that you will see all the new stuff when it is posted (no pressure, join only if you want)
  • Please do not share any of my digital images, printables, or tutorials directly with others, but please do send them on over to me so that they can peruse and collect the images themselves.
  • I would be thrilled and honored if you would send me links to any images or posts that you've done using something that I have shared with you.  If you say it is ok, I will even feature your work here!
  • If you want to recolor the images, feel free! 
  • If you have a special request, please let me know and I will see what I can do.
Most importantly be Fantastically Creative You!


I will be linking up to these parties over the next few days, hope to see you there!

I hope you have a wonderful day!
Antonella Quilling Art

Wednesday, September 18, 2013

Walkabout Wednesday Halloween Projects

Spooky Spider

Welcome back for another Walkabout Wednesday.  Last week we focused on Chalkboard Projects, this week it is a spooky Halloween experience... Grab your courage and let's take a peek...

As I may have told you, I was featured over at Practically Functional and it made my week! The project I was featured in is the Spooky Spider Halloween card I made here.  In honor of the feature, I am linking and pinning my fellow featured pals, and the wonderful Jess, to include in our Halloween Projects edition of Walkabout Wednesday... Here we go...


I hope you take a chance to visit and have a spook-tacular day!
Antonella Quilling Art

LinkWithin

Related Posts with Thumbnails