banner


Showing posts with label paper filigree. Show all posts

Wednesday, February 04, 2015

Heart ATC Throwback #tbt


Heart and Love ATC from Antonella at www.quilling.blogspot.com

It has been quite a while since my last Throwback Thursday post. I am happy to share this lovely ATC from 2008 on Bibiana's Throwback Thursday.

Heart ATC Throwback #tbt

I love looking back at my older posts, because they invariably bring back memories. Sometimes when I am playing with my quilling, shapes line up and create fun shapes. In this case, the double scrolls formed many of the hearts on this trading card.  If you want a brief tutorial click here to go to the original post.

It would be fun if you joined in here.

I hope you have a wonderful day!
Antonella Quilling Art

Wednesday, December 31, 2014

Favorites of 2014


Thank you for all your support over the years. 2014 was a lot of fun, and I hope that you had a great year. I wanted to share with you my favorite posts from 2014, and what a fun and varied year it was.

Let's start with a project that was featured on the Inspire Us Thursday Link Party
This super cute Quilled Christmas Tree ornament is easy to make. The pattern is versatile enough that you could wear it as a necklace or earrings if you wanted to.  Hop over to see what Antonella has for you at www.quilling.blogspot.com. #quilling #ornament

Here is a free printable that is perfect for remembering as we move into 2015. Only associate with great people, because life is too short to waste it on anyone of lesser value. The original post is here, but you can also find more of my printables here.
"Associate yourself with people of good quality, for it is better to be alone than in bad company"  Booker T. Washington
"Associate yourself with people of good quality, for it is better to be alone than in bad company" Free Printable from Antonella at www.quilling.blogspot.com

I love my quilling, and no yearly review would be complete without a quilling project. This card features reverse roses, and a really cute butterfly.


This is a fun printable for your next Birthday Card, look for a few more variations of this printable in 2015.

Perfect "Happy Birthday" printable that you can use for men, women, and children from Antonella at www.quilling.blogspot.com

I love, love, love this snowman, is there really anything more to say about it? One of my all-time favorites, had to add it again!
Lovely Quilled Blue Snowman card from Antonella at www.quilling.blogspot.com

Another fun printable, be yourself because there isn't anyone who can be you better! 

Two Inspirational printables: Be Unique, Be Awesome, Be You! and Weird is a side effect of awesome from Antonella www.quilling.blogspot.com


Finally, wrapping up the year with lots of Christmas projects as shared in the 12 Days of Christmas series! Lots of gift tags, ornaments, and gift cards.

The 12 Days of Christmas Project Collection. A wonderful collection of DIY projects, gift cards, gift tags, quilling and more from Antonella at www.quilling.blogspot.com


Here is wishing you a wonderful 2015!

Antonella Quilling Art

Wednesday, December 10, 2014

12 Days of Christmas Tree Ornament Quilled

This super cute Quilled Christmas Tree ornament is easy to make. The pattern is versatile enough that you could wear it as a necklace or earrings if you wanted to.  Hop over to see what Antonella has for you at www.quilling.blogspot.com. #quilling #ornament


12 Days of Christmas - Day 5 - Quilled Christmas Tree Ornament

Everyone should have a Christmas Tree, and this 3D Scroll Tree is just the thing. Lots of paper strips of various sizes, create some v-scrolls and assemble.

I used the 1/8 in (.3 cm) wide quilling paper. This photo shows green, but it looks nice in a multitude of colors like blue, turquoise, white, purple, pink, you name it.

Create the base of the tree by rolling a wider strip, approximately 3/4 in to 1 in wide

For the Branches (lol)

  • Cut 2 strips at various lengths (I cut about 4 different lengths) 3 in, 2-1/2 in, 2 in, 1 in
  • Note: These lengths are estimates, I did not measure them
  • Make V-Scrolls
  • Starting at the bottom, glue the v-scrolls starting with your trunk
  • Alternate which side they face so that as you move upward and build your tree moving you fill in the empty spots
  • Attach a hanger and you have an ornament
  • Tip: This can also If you make it smaller you can 

Tips / Hints / Ideas:

  • You can also wear this as a necklace, you can make it smaller or really small and wear them as dangly earrings too
  • If you are looking for something more festive, you can decorate the tree by adding a garland and some tiny paper ornaments or lights


How do you select your tree each year? I was talking with a friend about her journey to get their tree this year and thought I'd share.  This was the first time they were going to pick a tree from a tree farm, as luck would have it, it had rained all day the day prior, so the ground was very muddy. They were not deterred, she and her sister picked a tree, then waited for their tree, and waited, and waited... When they got the tree home, it was a little bigger than they thought it was going to be.  As we chuckled over the story, I told her that I should have warned her about being careful about how big the tree really is, they don't look quite so large among the other trees.  Do you have a Christmas Tree story?

Check out my Link Parties to see the badges of all the lovely places where I am linking to.

Updated: 12/21 -  I received an early Christmas present, I was featured on the Inspire Us Thursday Link Party! I am so thrilled!
Antonella's Quilled Christmas Tree Featured at Organized 31 www.quilling.blogspot.com


I hope you have a wonderful day!
Antonella Quilling Art

Thursday, December 04, 2014

Throwback Quilled Nativity Ornament


Silhouette Cameo Nativity Ornament with Quilling from Antonella at www.quilling.blogspot.com


Quilled Nativity Ornament

As promised, this is my throwback post. This ornament always makes me happy, I should make one for myself (I mean my children, so that way I can hang it on my tree until they are old enough to have their own tree).  I love the way the colors work together and the fact that I had quilling paper that matched the paper I used!

Quick instructions.... I cut the nativity from my Silhouette Cameo cutting machine. The image is one I purchased during one of their many sales.

The color combination was accidental. I am sure I am not the only person who does this, lol... I pulled out more than one color cardstock (I mean, can you really know what colors you might need?)  I cut the image from a few different colors, and as I peeled them off I placed them on the table I was working on, as luck would have it, I happened to place this one on a purple piece of scrap paper. As I laid it down, I was struck by the color combination and thought how nice they looked together, so I did what anyone would have done.....

I pulled out my cuttlebug and whipped out my Spellbinders dies and tracked down my purple paper and cut an Oval and then layered that over a double sided paper that had that antiqued cream look to tie back in the image that I cut with my largest Lacy Oval die.

Since, no project is complete without glitter, I added glitter to the purple oval and then glued down the nativity.  I had my quilling supplies out and added a quick quilled element (we can call it a flower maybe - lol)... pulled out some pearls and added them as well.

My regret is not making more than one. Of course, I am usually up quite late and then very early during this time of year trying to get all those projects I wait until now to start, so I am lucky to have completed even one of them, lol.  Are you like me, lots of plans and thoughts, but need the pressure of a deadline to get your juices flowing?

 Check out my Link Parties to see the badges of all the lovely places where I am linking to.

May your days be Merry and Bright!
Antonella Quilling Art

Friday, November 28, 2014

Quilled Thank You Card

Quilled Thank You card with reverse roses, fringed flowers, and butterfly from Antonella at www.quilling.blogspot.com


I wanted to share a very bright, sunny card to brighten your "Black Friday"

This card has fringed flowers, reverse roses, and a fun butterfly.

I have been looking over many of my past projects and wanted to go back to my "12 Days of Christmas"... So this year, as we enter the Christmas season, I am planning on sharing many quilling related items, lots of ornaments and instructions for the reverse roses and this fun butterfly as part of the
2014 12 Days of Christmas.... 

I will kick things off on Monday, December 1st.  Hope to see you then.

 Check out my Link Parties to see the badges of all the lovely places where I am linking to.

May your days be Merry and Bright!
Antonella Quilling Art

Thursday, November 27, 2014

Happy Thanksgiving!


A special "Happy Thanksgiving" wish for all my friends in the US

We have a snowy Thanksgiving this year, very unexpected.. looks so pretty, but definitely made traveling a bit of a challenge yesterday. We will be traveling today to visit with family.

Here are some previous projects, may you be safe and happy today!

Gobble til you Wobble Free Printable from Antonella at www.quilling.blogspot.com
Click here for the Free Gobble til you Wobble Printable


Thankful for Every Moment that has Passed free printable from Antonella at www.quilling.blogspot.com
Click here for the free Thankful for Every Moment that has Passed printable

Quilled Turkey pattern from Antonella at www.quilling.blogspot.com
click here for free Quilled Turkey pattern

Quilled Turkey pattern from Antonella at www.quilling.blogspot.com
click here for free Quilled Turkey pattern

 Check out my Link Parties to see the badges of all the lovely places where I am linking to.

I hope you have a wonderful day!
Antonella Quilling Art

Wednesday, November 12, 2014

Blue Snowman Throwback Thursday

Lovely Quilled Blue Snowman Birthday Card from Antonella at www.quilling.blogspot.com

Throwback Thursday Blue Snowman Birthday Card

I am so very sad, this is the last Throwback Thursday of 2014. If you are thinking of joining in on the fun, please hurry, I am a little late with my post (just pretend you didn't notice I should have posted this last Thursday or you may think I am early, lol). If you are looking for the original post, you can find it here.


Lovely Quilled Blue Snowman Birthday Card from Antonella at www.quilling.blogspot.com


Are there some cards you come back to over and over again? This is one of those for me because I absolutely love the way this snowman turned out.  The snowman was one of those pleasant surprises, I was given short notice of the birthday celebration and my son asked for a snowman on his cousin's birthday card.  So, what's a person to do?  At the time I was experimenting with a style of quilling made popular by Yulia Brodskaya and this little guy appeared from my strips of paper.  Have you ever had something emerge out of what you were creating that was unexpected? I'd love to hear your story.

I hope you enjoy my Blue Snowman, have a wonderful day!


Antonella Quilling Art

Thursday, October 30, 2014

Free Printable and Quilled Hat and Broom


Are you enjoying this walk down memory lane and this fun printable? This is definitely one that you print with a tongue in cheek chuckle.  This year, I placed this near the front door so that you see it when you enter our home. It causes quite a few chuckles and comments, so it is definitely doing what I intended. 


Click here to download this free pdf printable


For the quilled pieces, I have the instructions for quilling those too, just click on the pictures to be taken to the instructions.


Looking for that quilled witches hat? Check out these instructions to make this quick and easy quilled witches hat by Antonella at www.quilling.blogspot.com #quilling #filigrana #free #witch #Halloween


 Looking for that quilled witches hat? Check out these instructions to make this quick and easy quilled witches hat by Antonella at www.quilling.blogspot.com #quilling #filigrana #free #witch #Halloween"


I hope you have a wonderful day!
Antonella Quilling Art

Tuesday, October 28, 2014

Free Quilled Ghost Pattern #tbt

Halloween is approaching, and this
Throwback Quilled Ghost is just what you need, lol


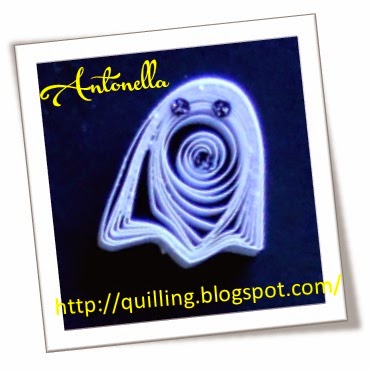
Super cute (I mean scary) quilled ghost... this free quilling pattern is shared by Antonella at www.quilling.blogspot.com #quilling #quilled #filigrana #paper-filigree #ghost #halloween
I wanted to fill this week with as many fun, last minute Halloween projects I could find.

This ghost can be as small or as big as you want him to be. The key is in how many quilling strips you use. Since I needed him to fit on this card, I only needed one strip, but you can use 2 or 3 or even more if you have a larger space to fill.

Super cute (I mean scary) quilled ghost... this free quilling pattern is shared by Antonella at www.quilling.blogspot.com #quilling #quilled #filigrana #paper-filigree #ghost #halloween

Free Quilled Ghost Pattern

  •  Take 1 strip of White quilling paper, create a loose coil (click here if you don't remember how to make a loose coil)
  • Place a dab of glue on the end, and pinch the paper where the glue was applied
  • This will make your coil look like a teardrop, but we want a ghost shape, so let's keep pinching, lol
  • Take your quilled shape and pinch the paper on either side and you will know have the ghost shape.  Tip: To make the bottom more uniform, I will squeeze the bottom together to make sure that that zig zag on the bottom has crisp folds.
  • For the eyes and mouth, I took a 1/16 inch punch and punched out his eyes and mouth, hmmmm, that doesn't sound very nice does it. I promise, this was created in only the most non-violent way... lol
 I hope you are enjoying your week and have a wonderful day!
Antonella Quilling Art

Thursday, October 09, 2014

Throwback Thursday - Breast Cancer Courage ATC #tbt

Since it is October, I thought it would be appropriate to share my "Courage" ATC that I created for my friend who is a breast cancer survivor. I made this in 2010 and am happy to report that she is still cancer free today!

Courage ATC - honoring a breast cancer survivor


Artist Trading Card (ATC) freely given, never sold... I haven't made any ATCs recently, and now I think I may want to try my hand at a few, how about you?

Here is a closeup of the quilling on this one, I love the look that the paper glaze gave it.  I think this was one of the first times I used paper glaze and have been a fan ever since!

Orange and Pink Quilled Mandala


Please click here to get the instructions to make the lovely Quilled Mandala and a tutuorial on making ATCs.

I am joining Bibiana's link party, you can find her badge on my link party tab!


I hope you have a wonderful day!
Antonella Quilling Art

Thursday, September 25, 2014

Throwback Thursday #tbt

Throwback Thursday - Quilling Pattern and Instructions


I thought it would be fun to participate in this new Throwback Thursday hosted by Stamping with Bibiana.

I have decided to go way, way,way back to June of 2006 (is that for real?) to a post where I shared a traditional quilling project with basic shapes that is perfect for the beginner  and the advanced quiller alike.  I make flowers like this all the time, it is fun to play with different color combinations.  Click here to be transported back to my original post and learn how to make these beautiful flowers.  It is funny to see what I considered a quilling pattern and instructions in the beginning and what I do now.

I think that going back in time and sharing these crafts will be lots and lots of fun! Cannot wait for next week!!! big smiles!!! It would be lots of fun if you joined in also.

stampingh with bibiana


I hope you have a wonderful day!
Antonella Quilling Art

Monday, December 23, 2013

Christmas Wishes Check out my featured Walkabout - My Ornament Collection

Antonella free quilling patterns printables and silhouette cut files
Antonella's collection of quilled ornaments

With Christmas literally around the corner, I wanted to share with you some of my favorite ornaments... I am sharing them with you via Pinterest in my ..... Christmas Wishes Walkabout - My Ornament Collection... I included my santa ornament above, I don't have a pattern for him at this time, but he was just so cute!

These are a few of my favorite things... 

=============================


Nativity Ornament - I used lots of my "toys" when I made this ornament. I used my cuttlebug and cut my Spellbinders ovals, I pulled out my Silhouette Cameo and cut this lovely nativity, and was able to find the perfect quilling papers to match the colors I used... a touch of glitter (of course) and some beautiful pearls...


Snowflakes on your tree... "I'm dreaming of a White Christmas..." and here is the perfect ornament for you... You can change the colors and make them all white, all pink or blue for a Baby's 1st Christmas, the possibilities are endless


Some Spreuer technique ornaments... Quilled Cross ornament with easel card, Angel, and a Spreuer Christmas Tree...


The tender singing of these sweet blue birds will brighten your day as you watch them on your tree... quilling, Memory box dies, punch, and my spellbinders all make these ornaments sing...


Poinsettia Ornaments - these are easy to make, just run a thread through one of your petals and you are ready to go. I think I would add glitter to the second poinsettia ornament. Yes, I am addicted...


=============================


I hope you have a wonderful day!
Antonella Quilling Art

Tuesday, December 03, 2013

Throwback Tuesday Quilled Scroll Christmas Tree


Free Quilled Scrolled Christmas Tree

I am feeling very nostalgic today, and wanted to go back in time to my first Christmas blogging and share with you my Quilled Scroll Christmas Tree.... At the time I was new to blogging and wasn't sure if I should leave the patterns up and almost took it down. I have had such enjoyment sharing with you over the years. I hope you enjoy this project as much as I do!

This is one of my favorite projects of all time! I love scrolls and find that they are so versatile and quick to pull together in a pinch.

To make this lovely little Scroll Christmas Tree....

For making this tree I used 1/8 inch (.3 cm) wide strips. For this design you will need the following number of strips:

1 Heart-T-Scroll
  • 1 - 3 inch (7.62 cm) heart scroll
  • 1 - 3 inch (7.62 cm) T-scroll
Heart T-Scroll Shape

2 Kissing scrolls (they look like a heart don't they? and shouldn't every Christmas tree have lots of love?)
  • 4 - 3 inch (7.62 cm) S-scrolls - place them touching as below to make the Kissing S-Scrolls
Kissing Scroll Shape

Remaining branches
Double Scroll with Tail Shape

Topper
  • 1 - 3 inch (7.62 cm) red diamond

Trunk
  • 1 - 3 inch (7.62 cm) red S-scroll

To put this tree together, I recommend the following:
  • Place the Heart-T-Scroll down first
  • Line up your 2 kissing scrolls next
  • To keep a straight line, it may be best to work over a piece of wax paper with graph paper underneath. Then you can use the straight lines to make sure your tree is straight.
Along the left side and then the right side, starting at the top, add the following:
  • S-scroll, pointing down
  • Double scroll, pointing up
  • S-scroll, pointing down
  • Double scroll, pointing up
  • Double scroll, pointing down
  • S-scroll, pointing down

See the picture for placement. You can then adorn the tree as in this example with pearls.
Free Quilled Scrolled Christmas Tree
Free Quilled Scrolled Christmas Tree with Pearls

I hope you have a wonderful day!
Antonella Quilling Art

Saturday, October 26, 2013

Freebie If the Broom Fits Printable

If the broom fits ride it - freebie printable

It is a beautiful fall day today, a bit brisk, but comfortable with a jacket!  Last night we went to my son's "Trunk or Treat" at his school.  What is a Trunk or Treat? It is a wonderfully fun, safe way for the kids to enjoy trick or treating. Some very fun parents decorate their cars and hand out candy to the kids in the parking lot of the school.  They have a DJ and dancing, and snacks and drinks.

Freebie If the Broom Fits Ride It from Antonella 


So, with the spirit of the season I am happy to share this fun printable with you.  I created a few versions of this quote for you, you can download the pdf file below.  I printed mine on a sheet of orange card stock, I thought it would be nice to see the black against the orange.  I then quilled myself a witches hat and fringed a broom to add to the project. I also took some of my leftovers from my various Halloween projects and added a spider web and the spider who made it, lol... I picked this quote because I thought it would be funny, and I was feeling a little cheeky at the time, so  "If the Broom fits ride it"....

Freebie If the Broom Fits Ride It from Antonella
If the broom fits ride it - click to download freebie


This was inspired by a Halloween Wall Hanging project by Sandee from In the Hills of North Carolina

I loved her use of the witches hat and broom. She experimented with paints and I used my quilling to create a project that I hope you have as much fun with as me!

As always, I am happy to share my tutorials, freebies / printables (and now cut files) with you, I only ask that you do the following:
  • Please leave a comment if you download  freebie / printable / digi, etc, because I would love to hear from you
  • If you enjoy the things I share with you, please become a follower so that you will see all the new stuff when it is posted (no pressure, join only if you want)
  • Please do not share any of my digital images, printables, or tutorials directly with others, but please do send them on over to me so that they can peruse and collect the images themselves.
  • I would be thrilled and honored if you would send me links to any images or posts that you've done using something that I have shared with you.  If you say it is ok, I will even feature your work here!
  • If you want to recolor the images, feel free! 
  • If you have a special request, please let me know and I will see what I can do.
Most importantly be Fantastically Creative You!

If you recall, I recently shared instructions for making a quilled witches hat that you can find by clicking here, this project modifies that project a wee bit so please click here for the instructions to make the Hat and Broom in this project.  Today, I am sharing the freebie printable of the quote I used in this project.

Freebie If the Broom Fits Ride It from Antonella
If the broom fits ride it - freebie from Antonella :-)


I hope you have a wonderful day!
Antonella Quilling Art

LinkWithin

Related Posts with Thumbnails