Hello Again, since I have had requests to show some more of my work, I decided to combine this with a free pattern... I have many more Free Quilling Patterns, please click on this link.
As you can see from the pictures that I have included, you can create a really pretty flower with only the teardrop and tight coil shape. These are some of my favorite shapes and these flowers are classic designs. You can see in the attached pictures that I have placed them on a double mat - very simple, but elegant (at least I think so). And something that I know you can do!!
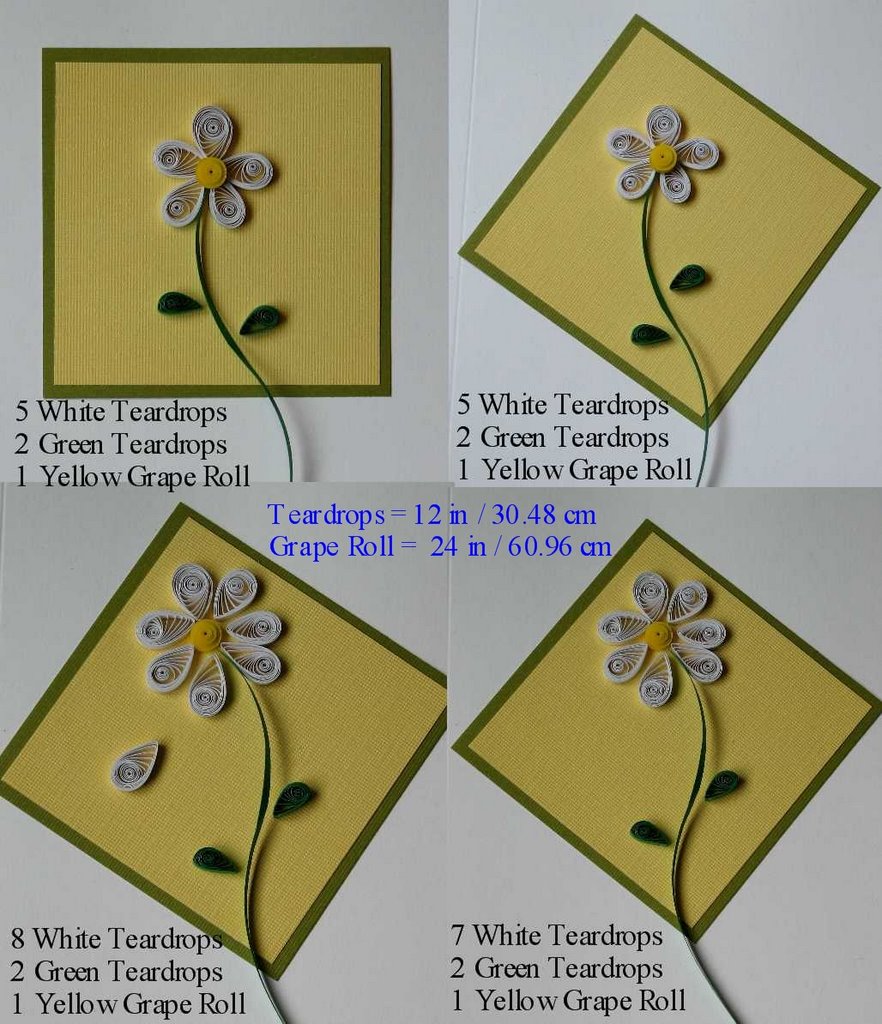
The flowers are your basic Daisy pattern. The first 2 are the same flower - 5 petals each, with the yellow center placed on top of the white teardrops. The difference is in the placement of the double mat behind the flower. The first one is a standard square shape, the second is the square turned into a diamond. There is something about the diamond shape that I really like on a card.
The bottom 2 flowers are what I call the "He Loves Me, He Loves Me Not Flowers" My reason is simple; the one with the petal that is "falling" down is someone pulling the petals off the daisy to find out about her true love. :-) The flowers themselves have 7 petals each. In addition to having more petals, these bottom 2 flowers have the center coil resting on the mat directly, it is not resting on the teardrop coils. The teardrop coils in this case touch the sides of the center coil.
 Please note, I have cheated a bit and modified the tight coil in the pictures to be what is called a grape roll shape, so I will explain it here for you (see the attached photo for a pictorial view). You start with the tight coil and then you shape it so that the center is "pushed out". This picture shows you how the shape starts out - I have placed the coil on its side so that you can see that the center pushes out when you are done.
Keep in mind that I used 1/8" (.3cm) paper in my example.
You can use any color paper that you wish, I selected white and yellow because I was making them to show someone and these were the colors that I needed for this project.
One last thing, I indicated the length of paper that I used, but I encourage you to experiment with different lengths! Please do try some and show me what you have done. I'm looking forward to hearing from you!
Copyright Antonella DeFalco
0 comments:
Post a Comment