banner


Showing posts with label quilled ornament. Show all posts

Wednesday, December 31, 2014

Favorites of 2014


Thank you for all your support over the years. 2014 was a lot of fun, and I hope that you had a great year. I wanted to share with you my favorite posts from 2014, and what a fun and varied year it was.

Let's start with a project that was featured on the Inspire Us Thursday Link Party
This super cute Quilled Christmas Tree ornament is easy to make. The pattern is versatile enough that you could wear it as a necklace or earrings if you wanted to.  Hop over to see what Antonella has for you at www.quilling.blogspot.com. #quilling #ornament

Here is a free printable that is perfect for remembering as we move into 2015. Only associate with great people, because life is too short to waste it on anyone of lesser value. The original post is here, but you can also find more of my printables here.
"Associate yourself with people of good quality, for it is better to be alone than in bad company"  Booker T. Washington
"Associate yourself with people of good quality, for it is better to be alone than in bad company" Free Printable from Antonella at www.quilling.blogspot.com

I love my quilling, and no yearly review would be complete without a quilling project. This card features reverse roses, and a really cute butterfly.


This is a fun printable for your next Birthday Card, look for a few more variations of this printable in 2015.

Perfect "Happy Birthday" printable that you can use for men, women, and children from Antonella at www.quilling.blogspot.com

I love, love, love this snowman, is there really anything more to say about it? One of my all-time favorites, had to add it again!
Lovely Quilled Blue Snowman card from Antonella at www.quilling.blogspot.com

Another fun printable, be yourself because there isn't anyone who can be you better! 

Two Inspirational printables: Be Unique, Be Awesome, Be You! and Weird is a side effect of awesome from Antonella www.quilling.blogspot.com


Finally, wrapping up the year with lots of Christmas projects as shared in the 12 Days of Christmas series! Lots of gift tags, ornaments, and gift cards.

The 12 Days of Christmas Project Collection. A wonderful collection of DIY projects, gift cards, gift tags, quilling and more from Antonella at www.quilling.blogspot.com


Here is wishing you a wonderful 2015!

Antonella Quilling Art

Wednesday, December 10, 2014

12 Days of Christmas Tree Ornament Quilled

This super cute Quilled Christmas Tree ornament is easy to make. The pattern is versatile enough that you could wear it as a necklace or earrings if you wanted to.  Hop over to see what Antonella has for you at www.quilling.blogspot.com. #quilling #ornament


12 Days of Christmas - Day 5 - Quilled Christmas Tree Ornament

Everyone should have a Christmas Tree, and this 3D Scroll Tree is just the thing. Lots of paper strips of various sizes, create some v-scrolls and assemble.

I used the 1/8 in (.3 cm) wide quilling paper. This photo shows green, but it looks nice in a multitude of colors like blue, turquoise, white, purple, pink, you name it.

Create the base of the tree by rolling a wider strip, approximately 3/4 in to 1 in wide

For the Branches (lol)

  • Cut 2 strips at various lengths (I cut about 4 different lengths) 3 in, 2-1/2 in, 2 in, 1 in
  • Note: These lengths are estimates, I did not measure them
  • Make V-Scrolls
  • Starting at the bottom, glue the v-scrolls starting with your trunk
  • Alternate which side they face so that as you move upward and build your tree moving you fill in the empty spots
  • Attach a hanger and you have an ornament
  • Tip: This can also If you make it smaller you can 

Tips / Hints / Ideas:

  • You can also wear this as a necklace, you can make it smaller or really small and wear them as dangly earrings too
  • If you are looking for something more festive, you can decorate the tree by adding a garland and some tiny paper ornaments or lights


How do you select your tree each year? I was talking with a friend about her journey to get their tree this year and thought I'd share.  This was the first time they were going to pick a tree from a tree farm, as luck would have it, it had rained all day the day prior, so the ground was very muddy. They were not deterred, she and her sister picked a tree, then waited for their tree, and waited, and waited... When they got the tree home, it was a little bigger than they thought it was going to be.  As we chuckled over the story, I told her that I should have warned her about being careful about how big the tree really is, they don't look quite so large among the other trees.  Do you have a Christmas Tree story?

Check out my Link Parties to see the badges of all the lovely places where I am linking to.

Updated: 12/21 -  I received an early Christmas present, I was featured on the Inspire Us Thursday Link Party! I am so thrilled!
Antonella's Quilled Christmas Tree Featured at Organized 31 www.quilling.blogspot.com


I hope you have a wonderful day!
Antonella Quilling Art

Thursday, December 04, 2014

Throwback Quilled Nativity Ornament


Silhouette Cameo Nativity Ornament with Quilling from Antonella at www.quilling.blogspot.com


Quilled Nativity Ornament

As promised, this is my throwback post. This ornament always makes me happy, I should make one for myself (I mean my children, so that way I can hang it on my tree until they are old enough to have their own tree).  I love the way the colors work together and the fact that I had quilling paper that matched the paper I used!

Quick instructions.... I cut the nativity from my Silhouette Cameo cutting machine. The image is one I purchased during one of their many sales.

The color combination was accidental. I am sure I am not the only person who does this, lol... I pulled out more than one color cardstock (I mean, can you really know what colors you might need?)  I cut the image from a few different colors, and as I peeled them off I placed them on the table I was working on, as luck would have it, I happened to place this one on a purple piece of scrap paper. As I laid it down, I was struck by the color combination and thought how nice they looked together, so I did what anyone would have done.....

I pulled out my cuttlebug and whipped out my Spellbinders dies and tracked down my purple paper and cut an Oval and then layered that over a double sided paper that had that antiqued cream look to tie back in the image that I cut with my largest Lacy Oval die.

Since, no project is complete without glitter, I added glitter to the purple oval and then glued down the nativity.  I had my quilling supplies out and added a quick quilled element (we can call it a flower maybe - lol)... pulled out some pearls and added them as well.

My regret is not making more than one. Of course, I am usually up quite late and then very early during this time of year trying to get all those projects I wait until now to start, so I am lucky to have completed even one of them, lol.  Are you like me, lots of plans and thoughts, but need the pressure of a deadline to get your juices flowing?

 Check out my Link Parties to see the badges of all the lovely places where I am linking to.

May your days be Merry and Bright!
Antonella Quilling Art

Monday, December 23, 2013

Christmas Wishes Check out my featured Walkabout - My Ornament Collection

Antonella free quilling patterns printables and silhouette cut files
Antonella's collection of quilled ornaments

With Christmas literally around the corner, I wanted to share with you some of my favorite ornaments... I am sharing them with you via Pinterest in my ..... Christmas Wishes Walkabout - My Ornament Collection... I included my santa ornament above, I don't have a pattern for him at this time, but he was just so cute!

These are a few of my favorite things... 

=============================


Nativity Ornament - I used lots of my "toys" when I made this ornament. I used my cuttlebug and cut my Spellbinders ovals, I pulled out my Silhouette Cameo and cut this lovely nativity, and was able to find the perfect quilling papers to match the colors I used... a touch of glitter (of course) and some beautiful pearls...


Snowflakes on your tree... "I'm dreaming of a White Christmas..." and here is the perfect ornament for you... You can change the colors and make them all white, all pink or blue for a Baby's 1st Christmas, the possibilities are endless


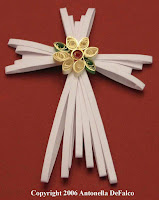
Some Spreuer technique ornaments... Quilled Cross ornament with easel card, Angel, and a Spreuer Christmas Tree...


The tender singing of these sweet blue birds will brighten your day as you watch them on your tree... quilling, Memory box dies, punch, and my spellbinders all make these ornaments sing...


Poinsettia Ornaments - these are easy to make, just run a thread through one of your petals and you are ready to go. I think I would add glitter to the second poinsettia ornament. Yes, I am addicted...


=============================


I hope you have a wonderful day!
Antonella Quilling Art

Saturday, December 22, 2012

Quilled Nativity Ornament and Snowflakes for Newton

quilled quilling nativity ornament
Good Morning Everyone!

Today I am going to share with you one of the new ornaments that I made this year... I usually share ornaments from prior years (lest someone get a sneak peak and ruin the surprise - lol)... I made an exception this year, because I think this ornament is perfect to go with the "Snowflakes for Newton" request I have included today.

I made this ornament (and have hand delivered it) to my friend Lucy.  I cut the nativity from my Silhouette Cameo cutting machine (yes, it is all Lucy's fault - lol)... The image is one I purchased during a sale they had recently... I am getting used to the cutting machine, and am still in the learning process...

I don't know how it works with you, but I truly believe that I am an "accidental" creator... Here is why... I cut the image from a few different colors, and as I peeled them off I placed them on the table I was working on, as luck would have it, I happened to place this one on a purple piece of scrap paper. As I laid it down, I was struck by the color combination and said that's it (see what I mean by "accidental")!

I have a cuttlebug (and you know how much I love my dies) so I whipped out my Spellbinders dies and tracked down my purple paper and cut an Oval and then layered that over a double sided paper that had that antiqued cream look to tie back in the image that I cut with the largest Lacy Oval die.

No project is complete without glitter, so I added glitter to the purple oval and then glued down the nativity.  I had my quilling supplies out and added a quick quilled element (we can call it a flower maybe - lol)... pulled out some pearls and added them as well.

Before I leave you today, I wanted to let you know about a special project I learned about from several online friends and bloggers.  This is for those affected by the recent tragedy in Connecticut.  If you are like me, every time you think about it your heart breaks.  So many lives and families hurt by the actions of one.  I have a young son, and cannot imagine him not returning from school one day.  That is why I selected the ornament above, it is through His mercy that these families will get through each day!

Snowflakes for Newtown
When school resumes for Sandy Hook, it will be in a new building.  There are many parent-volunteers who are working to ensure that the students are welcomed back by a winter wonderland.  They are doing this by decorating the new school with as many unique snowflakes as possible.  This is how you can help, and get everyone in the family involved young and old alike.

From the organizers: 
"We encourage senders to be as creative as possible, remembering that no two snowflakes are alike. Please make and send snowflakes by January 12, 2013 to the Connecticut PTSA"

Here is the Address for those wishing to contribute:
Connecticut PTSA
60 Connolly Parkway
Building 12, Suite 103
Hamden, CT 06514

I know it is a small thing, and hope that those who return find some wonder and awe in the snowflakes that will surround them.

I am joining these linky parties:
One Stop Craft Challenge - A Christmas Carol - mine is "Silent Night" inspired
The Answer is Chocolate - Link Party #84 - anything crafty
Alderberry Hill - Tis the Season 2012 Holiday Link Party

I hope you have a wonderful day!
Antonella Quilling Art

Lovely Quilled Winter Wreath Tutorial

quilled quilling winter wreath
Happy Wednesday Saturday! (as you may have guessed, I forgot to publish this post... you know what they say, the first thing to go is the memory... sheepish smile... but as a bonus, there will be 2 posts today :-)

It is a brisk day filled with sunshine today (it was, hope today will be too)! So nice to have the sun out and no rain in the forecast for the day :-)

I wanted to share with you a Winter Wreath project I did - this is one of my old ones... I used fringed flowers that create the wreath (this is an oldie but a goodie and there are lots of possibilities)

Wreaths are a lot of fun to make and use on your cards or as ornaments.  Or, if you go on a bigger scale, you can use them around your home...

The fringed flower at the top of the wreath is made in the following way:
  • 1 - 3 inch (7.62 cm) tight coil
  • 1 - 3 inch (7.62 cm) White fringed strip
  • 1 - 4 inch (10.16 cm) Green fringed strip
  • Glue the white and green fringed strips together at one end. At the end that is glued together, glue it to the red strip. Beginning with the red, roll the paper, keeping it tight and gluing it together.
  • After the glue has dried, place the flower on a hard surface and gently push down on the fringe so that the fringes are spread apart.  A tip is to take your needle tool or a pin and curl the edges as this will add a little extra to the fringes (you can do this if you haven't fringed a very dense flower).

The remaining 5 flowers are arranged around the wreath and are made in the following way:
  • 1 - 3 inch (7.62 cm) tight coil
  • 1 - 2 inch (5.08 cm) White fringed strip
  • 1 - 3 inch (7.62 cm) Green fringed strip
  • Glue the red, white and green strips together end-to-end Beginning with the red, roll the paper, keeping it tight and gluing it together.
  • After the glue has dried, place the flower on a hard surface and gently push down on the fringe so that they are spread out as shown.

To fill in the wreath, I did the following:
  • 8 or more - 3 inch (7.62 cm) teardrops that are placed between the fringed flowers to fill in the design.
  • 1 - 3 inch (7.62 cm) heart, see photo for placement
  • 2 - 3 inch (7.62 cm) curled strips (see photo). Cut the ends at an angle, and weave through the wreath for added color

I hope you have a wonderful day!
Antonella Quilling Art

Tuesday, December 04, 2012

Throwback Tuesday Quilled Wreath with Spiral Roses

Welcome to Throwback Tuesday


I  am truly enjoying "re-sharing" past projects with you.  I have a lot of wintery / Christmasy projects, so it is a perfect thing at this time of year!

I love wreaths, and I do think of them this time of year as the season of Advent kicks off.  This year we setup a wreath on our kitchen table with ribbons of purple and rose to ensure we had the correct colors (didn't plan correctly, so couldn't find candles with the proper colors)... No worries though :-)

Alas, I digress.... So this wreath was on a birthday card and is also an ornament.  I may have to pull up some other wreath themed projects I've made, but haven't yet shared... Let's plan on next week being "wreath focused" lol...

I created the wreath shape by taking 2 circle punches and punching one inside the other to create the general wreath shape (I used my 2 and 2-1/2 inch punches)

I then punched fern leaves from various green papers (I am one of the few people who purchased the Empunchler many many moons ago, and used their fern punch).  Some day I am actually going to remember to take out my punches and just punch the shapes over and over again so that I have a ready made stock pile, or I can do what I always do and make it at the last minute :-)

I made certain to punch a 1/16" hole at what would be the top of my wreath.  I do it after I add the greenery just in case it looks better with the hole positioned in a certain place... yes, I spend lots of time worrying and changing my mind.

I made 9 Spiral Roses (click here for a link to the spiral rose instructions)
you can make more or less, I actually created more than 9 and then played around until I found a grouping that I liked... that's what makes this so fun, you can change your arrangement and each wreath you make will be unique.

I then made about 20 - 3 inch (7.6 cm) green shaped teardrops for the leaves on my roses... again, I played with the arrangement until I liked what I saw.

Then I created a few spirals and sprinkled them around for good measure.

Finally, I added a jump ring, and later added ribbon for my hanger to complete the ornament.


I do enjoy creating pieces of my final project and each step along the way agonizing over how I am going to use it...  Truth be told, many times I will create the parts/pieces of my project, and lay the pieces down but won't glue it down right away, this gives me the opportunity to "sleep on it" - do you ever do that? I find that I sometimes get inspired to try something new or to try a specific layout... of course, sometimes the thoughts in my dreams work better than the actual end design - lol.

I'd love to hear from you!

Linking up here:
     Tuesday Talent Show #63 - Chef in Training - Share your Talent party
     Open House Link Party #82 - Answer is Chocolate

Enjoy!

Tuesday, November 27, 2012

Throwback Tuesday Quilled Snowman and Birdhouse Ornament

Welcome to Throwback Tuesday!

quilled snowman birdhouse ornament


This is an opportunity for me to re-share something that I've shared with you in the past... This being the holiday season and all, I am going to be sharing some ornaments and Christmas themed items from Christmas past... (did you like that little scrooge reference? lol)

My first re-share with you is an ornament that I have shown you in the past, this time I am also going to share with you the tutorial to explain how I created this little guy (you can tell it is a boy because he is wearing a top hat).  I want you to know that this is more of a guideline, since I created this guy quite a while ago and don't quite remember all the sizes...

First, I cut a Birdhouse shape out of designer scrapbook paper, I chose this paper because it was felted, and brown, and had the most beautiful scrolls on it... Ok, my paper addiction is showing :-)

So, I accented the birdhouse with a nice red roof and base, for the entryway, I added a sparkly red circle....

I hand cut the holly leaves from some wide quilling paper and then quilled some nice, red, berries.  I started with a strip approximately 4 inches long and quilled a tight roll.

The center piece is this sweet, little Snowman:
Large Bottom Snowball
  • 4 full strips of white quilling paper
Snowball Face
  • 1-1/2 full strips of white quilling paper
  • I then punched several black "coal" buttons and eyes
  • Cut a small orange triangle
  • Added 2 wiggle eyes (they do make the snowman)
  • For his top hat, I cut an approximate 1 x 1 inch strip of scrapbook paper
  • ... and then cut a circle out of the same paper for the brim of his stylish hat
  • Cut a strip of ribbon for his scarf
  • ... and of course added lots of glitter

You throw in a little love and there you have it... a friendly snowman ornament!

I hope you are having a wonderful day!


Enjoy!

Saturday, January 07, 2012

Fabulous Filigree Quilled Blue Bird Ornament

quilling quilled blue bird ornament
Hello and Welcome!

I have a new addiction passion... I am in love with my new cutting dies... I now have a small collection of Spellbinders Nestabilities dies and these incredibly detailed Memory Box dies....

I have to share what I have done with them over the holidays... I made these super cute ornaments! It is always a bonus when the fun products you have purchased actually make your handmade gifts even more beautiful and special.

So my plan is to share some of the ornaments that I have made and also embark on my 2012 calendar project, so each month I will show you a new calendar page, I can see where this is taking me already, I cannot decide which images, so I may have more than one calendar - at least this is something useful that I can force my friends to take give to friends! lol

It is a new year, so I have lots of ideas and energy... now if I could just win the lottery so I could do all of them :-)

These dies are so much fun to use! I am really having fun cutting them out of different paper and seeing how they look, what I like best.... Oh, the possibilities - now only if I could get my imagination to catch up to those possibilities!

quilling quilled blue bird ornament
For this lovely Blue Bird Ornament I used the Nestabilities Lacy Ovals  -I picked those specifically because I knew I was going to make ornaments and I wanted to be able to have something so they would hang nicely, and this lovely die did the trick! I also absolutely had to use some of my new Memory Box dies, and this lovely Frosty Border is what I chose.

Well, maybe I should take a step back and tell you how the process works... You see the ornaments are for my son's teachers, so on those years that I think I will be able to make handcrafted ornaments he gets to decide what his teachers get... So, his music teacher needed an ornament with birds and music notes... So with that information in mind, I get to pull my hair out figure out how and what exactly to make... This year he was very specific that they had to be blue birds :-)

Ok, so now that I have birds and music notes, I really did need something for them to be resting on, and did I tell you I absolutely love my Memory Box dies? So you see I had to find a way to include them, I really did! And this lovely "Frosty Border" die arrived and the idea was born.

Now, for my blue lovelies, I could have chosen quilling strips that were blue, but as I was placing my order for Christmas colored quilling strips, I happened upon this lovely paper called "Touch of Blue Gilded on Edge" and I thought, now that will make a statement!  Isn't it pretty? The base paper is white, and on the top edge is this beautiful shimmery blue!

free quilling quilled blue bird tutorial pattern
To make the birds I followed the same process, I just used a little bit more paper for the larger bird!
  • I started with the tail feathers - I really did, and you'll find out why in a sec... So, for the tail feathers...
  • 2 - 2 inch (5 cm) strips of paper, fold them in half, and curl the ends.  
  • Now, I rolled the teardrop for the body of the bird
  • 1 full strip of my Touch of Blue quilling paper, rolled and shaped into a Teardrop
  • Don't glue it just yet... but hold on tight to the pinched end, because this is where the tail feathers go :-)
  • Where you would normally glue your teardrop, you will take those tail feathers and glue them to the bird before you glue that outside strip to hold everything in place.  
  • Squeeze tightly to get a nice set of tail feathers
Beak, Feet, and Wing
  • For these remaining pieces, I took small scrap pieces and added them to the cuties
  • I can't give measurements, because I literally cut small pieces (and didn't measure, just figured what I thought would be proportional)
  • A small piece cut and bent for the beak and glued to the nice rounded end of the teardrop
  • A small piece bent in half, and then bent again for their feet
  • Finally 2 small pieces bent and rolled for the "wing"
I am entering this in the Sentimental Sundays "Snow, Blue, and/or Glitter" and my project has all 3 Yeah :-)

Make It Monday - Anything Goes!

I used the following products on this ornament:

Spellbinders Nestabilities Lacy Ovals and Classic Ovals


Memory Box Frosty Border from Ellen Hutson
Memory Box die Frosty Border

Quilling Paper from Whimsiquills (thanks Pat)

Enjoy the ride!! Copyright for Personal Use Antonella DeFalco

Saturday, December 31, 2011

Happy New Year - Good Bye 2011, Hello 2012!!!

WOW!!! Can you believe that today is the last day of 2011? I know it is true, but am aware of all that has happened this year and hoping that 2012 will be a fantastic year!

I thought it would be fitting to take a look at some of my favorite projects from 2011...

A Year in Review if you will... It was difficult to settle on just these ten, but I had to put some parameters around what I would share, or I would still be writing this - lol.  I have linked each picture to the original post that will show the technique, digi, printable, and/or tutorial.

I have included some quilled items... yeah, well, most of them are quilled projects... what can I say? I love to look at the quilling.  It actually makes me realize that I haven't done as much quilling as I would have liked, but something that hopefully I can make up for in 2012 :-)

I've also included some of the printables from the year, I am working on my tabs across the top to make things like the printables easier to find... look for some blog updates in 2012 :-)

And then I had to share the winter snowstorm before Halloween - I am still cold remembering that one!

I hope that each of you has a SAFE and HAPPY New Year!!!

quilling quilled snowman
Ahh, my Blue Quilled Snowman.

I absolutely love his scrolls, and the open quilling!
Don't you?
quilling quilled flower
Birthday Cake Card.

I had lots of fun making this card and trying a new technique too!  I even got to play with a cuttlebug, neat.

quilling quilled horse atc
Spirit ATC

This is my all time favorite ATC, probably because I love horses.
quilling quilled angel ornament

Christmas Angel

Who can resist this sweet little angel ornament?

hug birthday gift card holder greeting card

A Hug Card

This is one of my favorite style of cards... and works so well with those gift cards.

snowy picture
Our Halloween snowfall and a week with no power - Brrrrr...

free fathers day printable card

Father's Day printable

I had lots of fun with making printables this year.


quilling quilled folk art bird
Folk Art Bird

I love folk art and this was inspired by that tradition.

quilling quilled spreuer cross ornament

A Cross Ornament

I find that I make a lot of spreuer designs, and this is no different!

free patriotic printable flag pledge of allegiance

Flag printable

Thought this was a nice way to end my year in review with a patriotic printable!

May 2012 bring you lots of inspiration and joy!

Enjoy! Copyright for Personal Use Antonella DeFalco

Friday, December 02, 2011

Filigree Friday Cross Ornament

Happy Filigree Friday Everyone!!

quilling quilled spreuer cross dove christmas ornament
I hope that you are enjoying your day! It is too early to know for certain, but I am hopeful today will be nice and sunny (a bit on the colder side, but the sun will definitely go a long way to making it a beautiful day!)

Wow! The holidays are here!!! I cannot believe it, last week was Thanksgiving (for those of you who live in the states) and ourselves with lots of food and goodies... I personally love the goodies - lol!  And now we are almost a week into Advent! Christmas is just around the corner for us!!

I am way, way, way behind in my Christmas ornaments... I am definitely starting to feel worried, because every time I think that I have set aside time to work on them something comes up!! I actually took off yesterday and today (now I didn't have the whole day planned to work on them, but you would think I would have found at least an hour yesterday - nope, didn't happen!) Between running to do something in the morning with my stepdaughter (that was supposed to be 3 hours and ended up being 5 hours - travel time included) and then regular afters school stuff and dinner and yeah, let's not forget the long phone conversation with a friend who moved to Florida, I kinda didn't get anything done... but today will be different... Positive Thinking!!!  and for extra motivation, my friend Lucy will continue to provide the necessary positive reinforcement as she continues to design her awesome Christmas cards this year!!

So, because I have been so bad, I decided I'd share an ornament I made a few years ago.  This is a cross ornament with a sweet dove in the center, the ornament is hanging from an easel card so it could be easily removed or the card itself could be where the ornament was displayed.

quilling quilled spreuer cross dove christmas ornament
Here are some links to similar projects that have more details about the techniques used, if you want specific instructions for this cross, please let me know and I will post them....
Easel Cards and Spreuer Crosses (click on the pictures to go to those posts)
quilling quilled easel card graduation
Easel Card - Graduation

quilling quilled easel card snowman
Easel Card - Snowman

quilling quilled spreuer cross christmas ornament
Quilled Spreuer Cross - Christmas

quilling quilled spreuer cross christmas ornament
Spreuer Cross - Communion

Have a wonderful day and may it be super productive!!!

Hey, I've linked up to this wonderful 26 Day Christmas Craft Marathon Linky Party - http://lisascraftblog.blogspot.com/2011/11/christmas-craft-marathon-linky-party.html

and The Winter Holiday Craft Party - http://www.craftsunleashed.com/index.php/seasonal/holidays/winter-holiday-linky-party/  

Enjoy! Copyright for Personal Use Antonella DeFalco

Sunday, December 13, 2009

Free Quilled Snowflake Ornament Pattern

It is that time of the year... the cold weather has rolled in, we have had 2 winter storms and I have gotten stuck in the snow already and it is only December... lol

quilled quilling red snowflake ornament


I hope you enjoy this Red and White snowflake ornament. This is a 6-pointed snowflake for you to enjoy.


1 - 12 in (30.5 cm) White Tight Roll. This is for the center of the ornament.


6 - 2 in (5 cm) Red Tight Rolls. They will go all around the center white tight roll.


6 - 6 in (15.2 cm) White Teardrops. Glue the point of the teardrop between the 2 inch red tight rolls.


6 - 4 in (10.2 cm) Red Tight Rolls. Glue to the rounded white teardrop.


6 - 6 in (15.2 cm) White Teardrops. Glue the rounded part of the teardrop to the red tight rolls.


Add a jump ring to one of the points with a ribbon to hang from the tree.

Once the ribbon is attached you can enjoy the movement of the snowflake on a variety of places. You can add this ornament to a card and turn your card into a gift as well. If you are working on a winter scrapbook page, you can make one of these to adorn your page.


Or you can just hang it from your tree!

Enjoy!
Copyright for Personal Use Antonella DeFalco

Technorati Tags: , , , , , , ,

Thursday, January 01, 2009

Free Quilling Snowflake Card Pattern

quilled snowflake ornament card


Here it is, the first quilling pattern of 2009! This is a quilled snowflake ornament that is attached to a card. This card doubles as an ornament for a really special treat for the recipient.

quilled snowflake ornament

Let's begin with the snowflake ornament measurements:
  • 1 - 12 inch (30.5 cm) White Tight Roll for the center of the snowflake

  • 5 - 3 inch (7.6 cm) Blue Tight Roll (will go around the center tight roll)

  • 5 - 6 inch (15.2 cm) White Teardrop (this will alternate with the blue tight roll around the center tight roll. The point of the teardrop will be glued to the center tight roll. See photo for placement)

  • 5 - 6 inch (15.2 cm) Blue Tight Roll (will be glued to the top / rounded portion of the white teardrop)

  • 5 - 6 inch (15.2 cm) White Teardrop (will be glued to the blue tight roll along the rounded end)

To make this snowflake sparkle, I used a glitter glue on both the front and back of the snowflake. I applied the glitter to one side at a time and allowed it to dry before turning it over and glittering the opposite side.

All that is left is the find a jump ring and attach it to one of your points and then tie a string to complete the ornament.

Making the Card

  • Start with Blue cardstock (this is a quarter fold size card)

  • Using various sizes of snowflake stamps, stamp snowflakes on card. I used the Tsukineko Silver which gives the card a glittering look.

  • Tear a piece of white glitter paper and attach to bottom of the card to give the appearance of snow.

  • Stamp "Merry Christmas" or "Let it Snow" or some other sentiment.

  • Apply snowflake and snowman punches (or brads if you have them) to give the card a layered look.

  • Attach the snowflake ornament from above and you are finished.

There you have it. A cute snowflake ornament and card, the winter theme can be used for any occasion during the winter months.

LinkWithin

Related Posts with Thumbnails