banner


Sunday, December 03, 2006

How to Make Fringed Flowers

fringed flower quillingFor many of my designs, I like to use Fringed Flowers. Early on in my quilling, I found that I liked these flowers. It may have been because they look difficult, however they are easier than they appear.

If you are unsure how to make fringed flowers these instructions are for you. For more information about Fringed Flowers also check out the Basics of Fringe Design and detailed instructions for making fringed flowers. I have included more pictures of fringed flowers so that you can see the effect of using different widths and angles in your cuts.


The important thing to remember with fringed flowers is that the width of the paper that you use is not important. You can use 1/8 in (.3cm), 1/2 in (1.27 cm), 3/8 inch (.95 cm) or any size in between or wider. The difference is in the size of the flower. When deciding what width paper to use, think about the size of your pattern or item that you are quilling and select a width that is in proportion to your project size. The various photos that I have shared show you how different each quilled flower can look. The possibilities are endless.

There are machines called "fringers" that will fringe your paper for you. I do not use one, instead I hand fringe my strips. These instructions are provided for those of you who are hand fringing your paper.

The tools that I use are small scissors (these can be craft scissors, nail scissors, or childrens scissors). I recommend something that has a nice sharp cut. Since many of you have nail scissors, start with those. If you are a paper piecer, then you already have the appropriate tools.
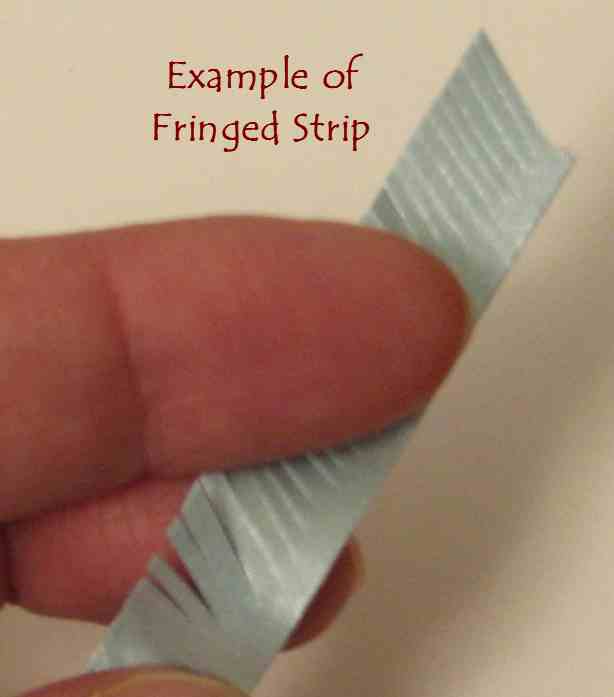
fringed flower quillingTo start, take your scissors and cut tiny cuts approximately 3/4 of the way through the width of the strip. It looks something like this ||||||||||||||||||||||||, please refer to the picture for a close up of an actual fringed strip. The closer (or thinner) you make your cuts, the more delicate the flower will look.

fringed flower quilling
After you have cut your strip, you can begin making your coil. Referring to this picture, if you start your coil using the strip that has been cut, your flower will look like this. For this flower, I did not press the fringed pieces down. They naturally lined up this way because I cut my fringes at a slight angle.
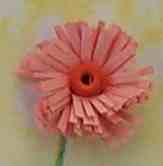
fringed flower quillingIf instead, you add a strip of uncut paper and glue it to your fringed strip and begin rolling from the uncut paper, it will look like this picture. You may prefer this look or you may make your flowers this way because it is easier to start with the uncut strip, in this case a 1/8 inch (.3 cm) width paper, and make a tight coil at the beginning. This makes rolling the fringed strip which is glued to the uncut paper easier. Once you have rolled and glued the strips and the glue has dried, place the flower on a hard surface and gently press down on the fringes and flatten them as shown in this picture. You can also take your needle tool or a pin and slightly curve the ends for a more rounded look.

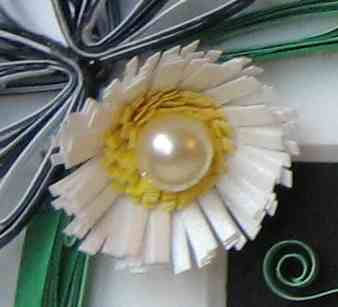
One of my favorite things to do is to add little pearls in the center of my fringed flowers. I think it adds that bit of charm to the overall appearance.

For more information about Fringed Flowers check out the Basics of Fringe Design and instructions for making fringed flowers.


fringed flower quillingEnjoy!

Copyright Antonella DeFalco


Technorati Tags: , , , , , , ,

Days of December Quilling

Happy Holidays! As my special treat in December I am posting a "Quilling A Day" until the 25th of December.

If you are new to quilling,
please click to learn the basics of quilling and to learn to make the basic quilled shapes that are assumed you know how to do in creating many of these designs.

The designs will be predominantly focused around the Holidays and I will attempt to make something for everyone. Please check back here for the list of items that have been done so far:

  • Day 1 - Loose Coil Christmas Tree - very easy Christmas Tree design, can be done by children and adults alike.
  • Day 2 - Birdhouse of Love - combines paper piecing with quilling to create a one-of-a-kind winter white and green birdhouse.
  • Day 3 - Winter Wreath - in the spirit of Advent, I have created a wreath to share. This design uses fringed flowers.
  • Day 4 - More Scroll Shapes - I describe the Heart-T-Scroll, double scroll, and Kissing S-Scroll shapes. These are shapes that you will need for the next few days of projects.
  • Day 5 - Scroll Christmas Tree - I love the look of this tree. It is made using S-scrolls, a Heart-T-Scroll, double scrolls and kissing s-scrolls. This project will be available for a limited time.
  • Day 6 - Love Bird Birdhouse - This one has a new design of mine, my S-scroll love birds, check them out.
  • Day 7 - Heart throb Snowman - This guy is all dressed up and ready for a night on the town
  • Day 8 - Gilded Poinsettia - this gilded paper makes this poinsettia breath taking
  • Day 9 - Fancy Ornament - this is a small ornament for your scrapbook Christmas layout, or Christmas cards, or possibly for your tree
  • Day 10 - Spreuer Instructions - you've heard about it, now you can see what it is all about
  • Day 11 - Spreuer Angel - A sweet Christmas Angel using the Spreuer technique
  • Day 12 - Spreuer Cross - A lovely Cross using the Spreuer technique
  • Day 13 - Triangle Christmas Trees - basic design, using triangle shaped coils to make trees
  • Day 14 - Spreuer Tree - a very clean, basic Spreuer tree with lights and a star on top
You can find more Free Patterns if you are interested. As always, send me comments with ideas or suggestions for information, tips, or patterns that you would like to see.

Important note: These items will remain posted until after the holidays, at that time, I may take some of the free instructions that have been posted and remove them.


Technorati Tags: , , , , , , ,

Enjoy!

Copyright Antonella DeFalco

Saturday, December 02, 2006

On the Second Day of Quilling

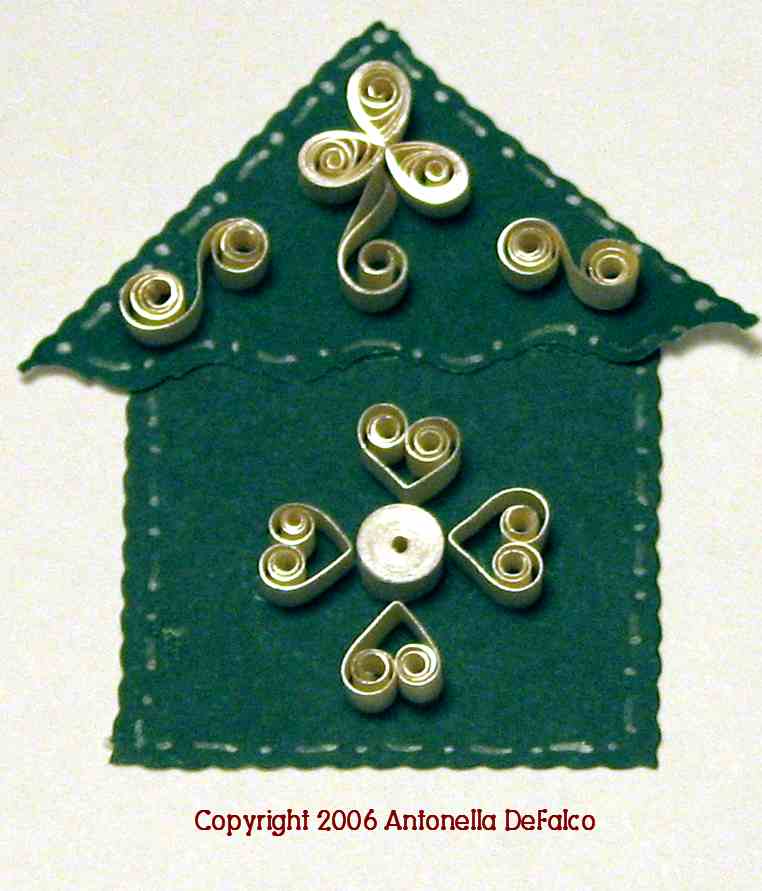
free quilled birdhouse pattern quilling
On the second day of quilling we Adorned a Birdhouse.

This will not be the only birdhouse that we see during this Quilling month of December.

For this Birdhouse, I started with creating the basic birdhouse shape by taking green paper and decorative scissors and did the following:
  • Cut a 1-/12 inch square for the base
  • Cut another 1-1/2 inch square and cut it in half at an angle to make a triangle for the roof
  • I then took a gel pen and made a dash-dot (-.-.-.) pattern around the outside edge. I did this so that it is easier to see the delineation between the roof and the base.

I had some new English quilling paper that has a beautiful gilded edge. I love it, it is so beautiful and I will tell you that the pictures don't do it justice.

The next step is to make quilling to adorn our new birdhouse. For this design, I used a shape called a "flag" that I have not previously described. Use this picture as your guide and do the following:
quilling shapes

  • Take your strip of quilling paper (width does not matter) and fold it in half length-wise
  • Do not glue the strip
  • Starting from the end that is open, start a coil
  • You only want to make a few turns and as you turn you will see the end where the fold is will start to push out, like a flag


The instructions for putting together the birdhouse are as follows:
Roof
  • 3 - 3 inch (7.62 cm) teardrops
  • 1 - 3 inch (7.62 cm) flag
  • Arrange the 3 teardrops with points glued together and attach flag to the glued points
  • 2 - 3 inch (7.62 cm) S-scrolls are added for additional decoration
Base
  • 1 - 9 inch (22.86 cm) tight coil
  • 4 - 3 inch (7.62 cm) heart scrolls
  • Arrange as shown in picture
This would look great on a card or if you add a hook you can make it an ornament to hang on your tree.

Technorati Tags: , , , , , , , ,


Enjoy!

Copyright Antonella DeFalco

Friday, December 01, 2006

On the First Day of Quilling

Welcome to our First Quilling Pattern!

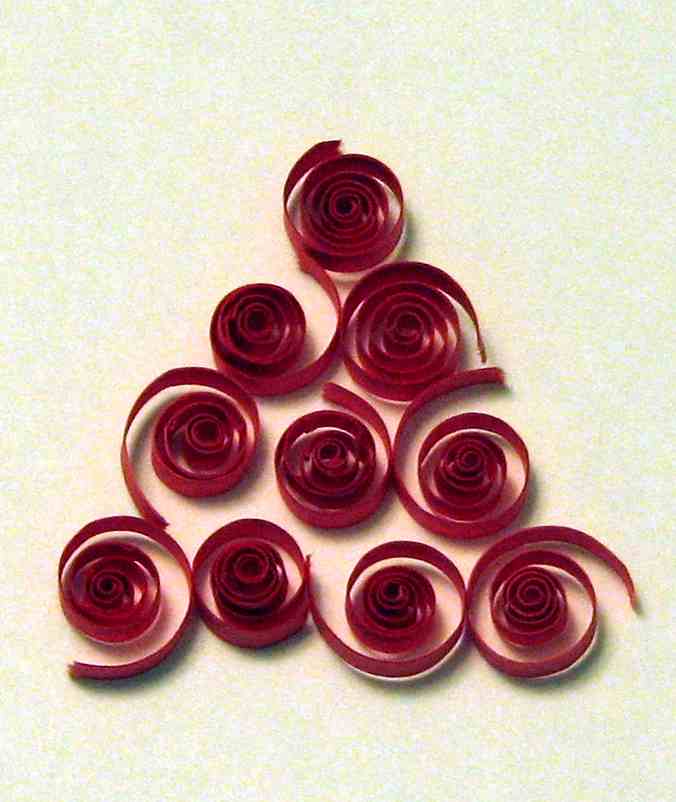
For today's quilling we will make your basic open coil Christmas tree. This is a staple that everyone should know how to make because it is so simple and quick to make that if you needed to make a quick Christmas card in a pinch, this is probably what you put on it.

I decided that green Christmas trees are overrated, so today we will make some neat red trees.

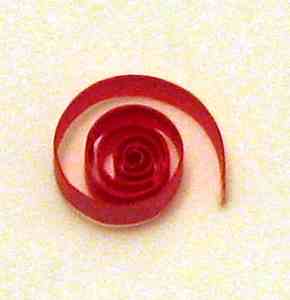
The tree itself is made with 10 open coils. You make the open coil by winding your paper and then releasing it when you get to the end of the strip. It is an open coil because you do not glue the end. This is a picture so that you can see what it looks like.
free pattern quilling open coil

I like working with 3 inch (7.62 cm) strips. The reality is that you can use any size strip you would like. You can make the tree smaller or larger by changing the strip length or by adding more rows of open coils. In the basic design I am sharing with you today, I selected a 4 row tree with the following:
  • Row 1 (top) - 1 open coil
  • Row 2 - 2 open coils
  • Row 3 - 4 open coils
  • Row 4 (bottom) - 5 open coils

You simply add one more coil than the previous row for each new row you add. Here is a picture of the basic tree.
free pattern quilling quilled christmas tree

In this first tree that I made, you will see that I tore the ends. Although this is perfectly acceptable, I find that when using open coils I like a more clean look. You will see in the additional pictures, I have created trees where I have cut the end at an angle.

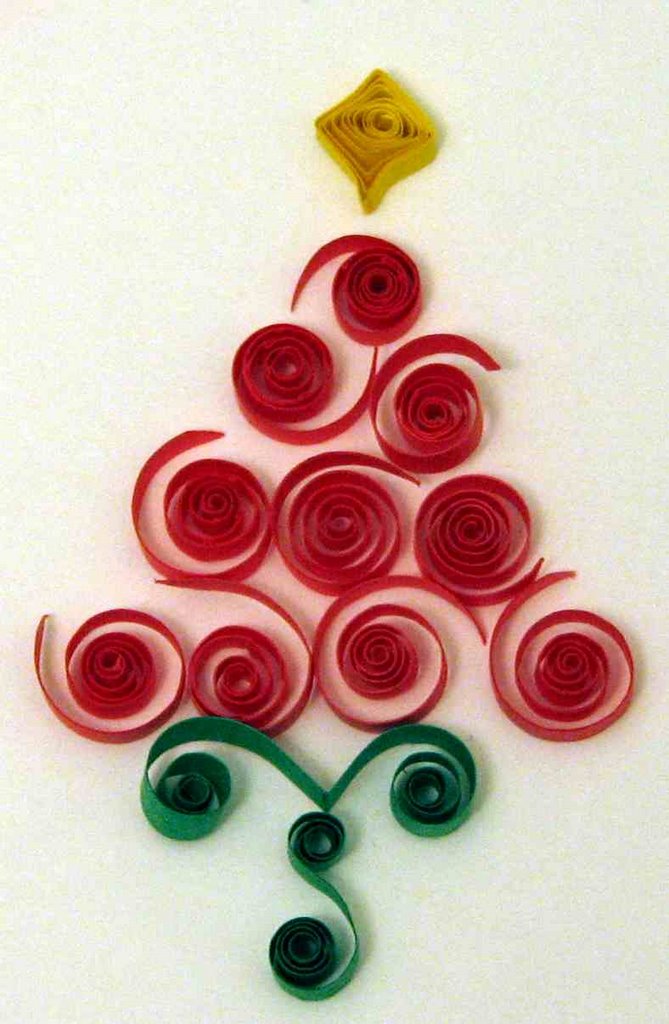
The two additional trees that I have included, have some finishing touches added to them.
free pattern quilling quilled christmas tree


You will see that I started with the Open Coil Christmas Tree instructions above. To this tree I have added the following:
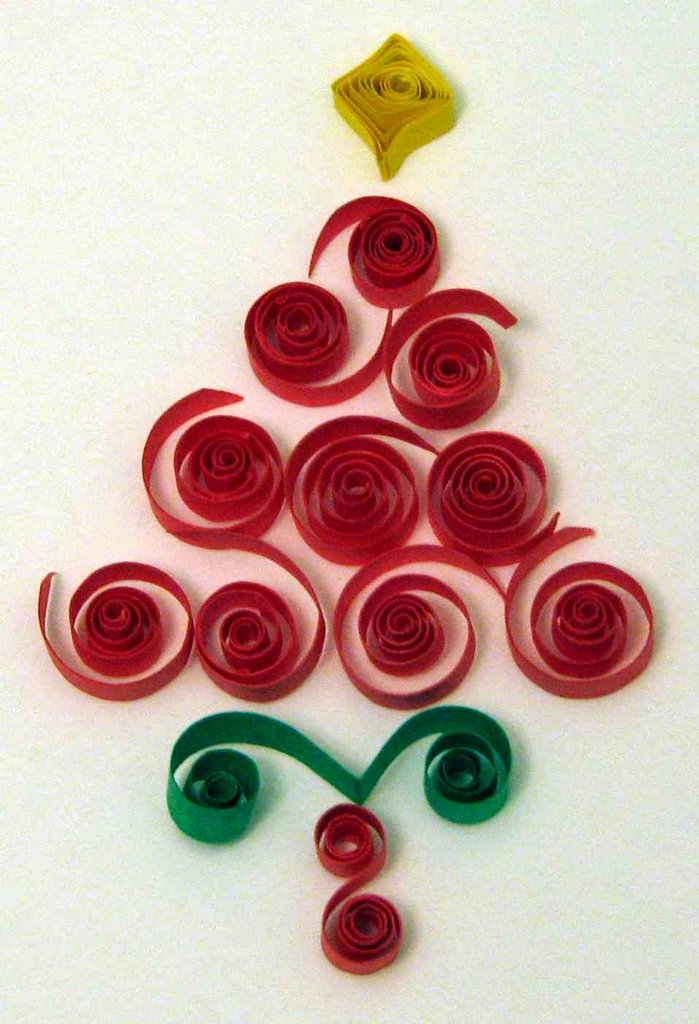
  • 1 - Diamond Star - 3 inch (7.62 cm) Diamond
For the trunk of the tree I have used
  • 1 - 3 inch (7.62 cm) V-Scroll
  • 1 - 3 inch (7.62 cm) S-Scroll

For those of you visiting for the first time, you can find the instructions for the Coil and Scroll shapes by clicking the links.


Here is a picture of the Christmas Tree I added to my Christmas cards last year.
free pattern quilling quilled christmas tree
A word of advice. The open scrolls are quite delicate when mailing. The open end will get squished unless you carefully package it. This is why I usually hand deliver my quilled cards, but on those occasions I have to mail them this is what I try to do. I buy a padded envelope (or use bubble wrap). I take 2 pieces of cardboard, one for the top and bottom to stabilize the card so it doesn't bend in the mail. I then will make at least 4 tight coils. It is important that the width of these tight coils is bigger than the height of your quilled piece. I then place one piece of cardboard on the back of the card. For the piece on the front, I glue the tight coils to the other piece of cardboard, taking care to align it so that it does not touch my quilled design. I then place this in the envelope and mail it. I take this special care particularly if I have made something that is more delicate, like these open coils or fringed flowers.

Have fun with this, and remember to experiment!

Technorati Tags: , , , , , , , ,


Enjoy!

Copyright Antonella DeFalco

LinkWithin

Related Posts with Thumbnails