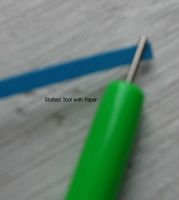
This is a close up of my slotted tool with a teal paper. Sorry it is not as clear as I hoped it would be. :-(
As you can see, the paper goes through the slit at the top.
I think the slotted tool is easier to learn how to use than the needle tool and I use it today when I make my folded roses and when I make fringed flowers and I only use the fringed paper. This is purely choice, as you continue to quill you will start to find your own way of doing things. Don't feel that it is wrong; it is what will make your quilling unique.
For more Free Quilling Instructions, please click on this link.
If you are interested in Free Quilling Patterns, please click on this link.
So, back to the basics of quilling.

I would suggest that when you start, you take 4" (10.2 cm) to 6" (15.2 cm) pieces of quilling paper in the 1/8" (.3cm) width. These are very standard lengths and will give you the opportunity to practice the basic shapes. You can take your ruler and measure the length that you wish to use. It is best to tear your paper and not to cut it because you will glue the torn end and the feathered (torn) end will blend and it will not be as noticeable where it is glued.
Ok, here are your basic steps to create your coils:
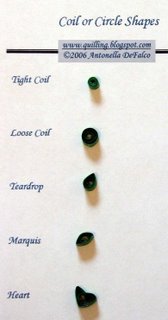
Tight coil
- Take your quilling paper and place it into the slotted tool
- Your paper should be at the very tip of the slot (in my picture, you can see the paper coming through the slot - when you are ready to roll your paper, you should not be able to see your paper coming through the other side)
- Holding your paper in one hand and your tool in the other, in front of you, start turning your tool
- The paper will begin turning as the tool grabs the paper
- Try to keep the edges of the paper as even as possible - if you don't, you will find that your finished coil will have what I like to refer to as a little belly
- Try to keep your paper as tight as possible
- When you get to the end, you will want to pull the paper off of the tool. When making a tight coil (like this is) I glue the end and carefully pull the paper off.
- Basically the same as the tight coil, but you don't keep as much tension on the paper
- You do not want to make it as tight
- When you get to the end, a little trick is to turn it in the opposite direction from which you were turning it. This makes it easier to pull the paper off without creating what someone has referred to as a tornado
- After you pull the paper off the tool let it open up - this is what makes it a loose coil
- Now you can add a dab of glue and you are done
Teardrop or raindrop shape
- Take your loose coil and pinch the end where you glued it
- I generally pinch with my thumb and index finger
- Take your loose coil and pinch the end where you glued it
- Take your teardrop shape and pinch the opposite end
- I like to hold the coil so that I pinch first one end then the other end - but I essentially hold both pinched ends one in each hand at the same time
- Take your loose coil and pinch the end where you glued it
- Take your teardrop shape, and while holding the pinched end in your hand, press in from the top (or rounded part of the teardrop)
- This will create the indentation at the top to make it look like a heart
I will cover the Scroll shapes next... Looking forward to seeing you come back!
:-)
Copyright Antonella DeFalco
3 comments:
thanx 4 d border idea!
love ur blog..am following the instructions carefully..waiting 4 u 2 put up some of ur work too
with care
chandni
Hope to see more of your stuff also. :-)
Great intruction.I am new to quilling and want to learn quilling.ur blog helps to me.Thanks
Post a Comment