Quilling Tabs

Thursday, December 14, 2006

On the 14th Day of Quilling - Spreuer Tree


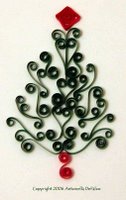
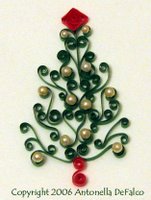
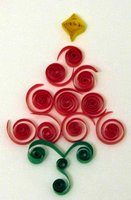
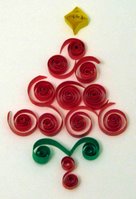
On the 14th Day of Quilling we made a Spreuer Tree and decorated it with some lights.

The pattern for today is a very simple tree with a splash of gilded lights using the Spreuer technique. For this project I started wrapping in the center and then wrapped to the right and then the left. You will see me write R or L to indicate this, please remember that it will turn out the same if you go the opposite sides as long as they are even and you continue to alternate. I am providing my instructions this way, because I needed to pick a direction.

For the basic tree, do the following:
  • You will need approximately 24 inches (60.96 cm) of 1/8 inch (.3cm) wide strip
  • Start 15 - 15 - R13 - L13 - R13 - L13 - R13 - L13 - R13 - L13 End
  • You will notice that I did 2 times around the center 15 to create the tree trunk, and then continued to make the remainder of the tree by alternating along the 13th tooth.

To make the lights I used 1/16 inch (.15 cm) wide strip
  • I simply wrapped it around the tree 3 times and glued it to the back at the top and bottom
  • For added support I glued at a few points to anchor it to the tree
  • 6 - 3 inch (7.62 cm) 1/16 inch (.15 cm) teardrops for the lights

Finally, 1 - 3 inch (7.62 cm) diamond for the star at the top.

The trees themselves are relatively quick to make. The lights can take a little bit of time. I took my 1/8 inch (.3 cm) strips and cut them in half to get the 1/16 inch (.15 cm) wide strips.

Enjoy!
Copyright Antonella DeFalco

Technorati Tags: , , , , , , , , ,

On the 13th Day of Quilling - Triangle Trees

quilled triangle christmas tree
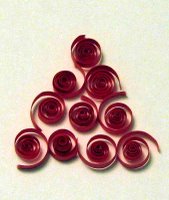
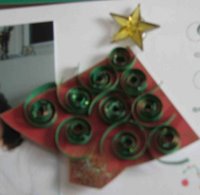
On the 13th day of quilling we made something really simple... Triangle Christmas trees.

If you have ever done any scrapbooking or paper crafting, chances are that you will have run across one or more variations of this design. It is one of the simplest tree designs out there and it uses the rule of threes. Quite simply you take 2 triangles, each progressively larger than the last and construct a tree.

For this particular set of trees I used the following:
  • 1 - 6 inch (15.24 cm) coil triangle
  • 1 - 12 inch (30.48 cm) coil triangle
  • 1 - 24 inch (60.96 cm) coil triangle

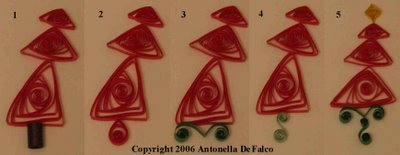
You will see that the picture I have attached shows 5 different variations of the tree.
Tree 1:
  • 1- 3 inch (7.62 cm) tight coil
  • I used 3/8 inch (.95 cm) width paper
Tree 2:
  • 1 - 6 inch (15.24 cm) teardrop
Tree 3:
  • 1 - 4 inch (10.16 cm) V-scroll
Tree 4:
  • 1 - 3 inch (7.62 cm) S-Scroll
Tree 5:
  • 1 - 6 inch (15.24 cm) diamond scroll
  • 1 - 4 inch (10.16 cm) V-scroll
  • 1 - 3 inch (7.62 cm) S-Scroll
See the pictures for placement and to see the various options.

Enjoy!
Copyright Antonella DeFalco

Technorati Tags: , , , , , , , ,

Wednesday, December 13, 2006

On the 12th Day of Quilling - Spreuer Cross


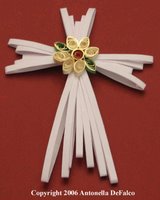
On the 12th Day of Quilling we made a Spreuer Cross.

Click for help on Spreuer Instructions. For this project I started wrapping in the center and then wrapped to the right and then the left. You will see me write R or L to indicate this, please remember that it will turn out the same if you go the opposite sides as long as they are even and you continue to alternate. I am providing my instructions this way, because I needed to pick a direction.

The fun thing about Spreuer is that it is really a lot of fun and just like all quilling, it is something you can experiment with and find new ways to use it... I hope you give this a try!

So, for the cross you need the following:
You need to make 3 of these:
  • Start 6 - R7 - L7 - R8 - L8 End

For the longer part of the cross, make 1 of these
  • Start 12 - R13 - L13 - R14 - L14 - R15 - L15 End

  • Glue the long piece to one of the short pieces (top to bottom)
  • Glue each of the remaining short pieces to either side of where you joined together the top and bottom pieces

Center flower:
  • 6 - 3 inch (7.62 cm) white teardrops
  • 1 - 3 inch (7.62 cm) red loose coil
  • 3 - 3 inch (7.62 cm) green marquis
  • Arrange to make flower as shown
  • Attach to Cross where all pieces are joined together


Enjoy!
Copyright Antonella DeFalco

Technorati Tags: , , , , , , , , ,

Tuesday, December 12, 2006

On the 11th Day of Quilling - Spreuer Angel

spreuer angel
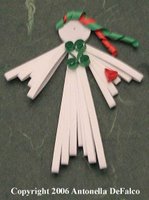
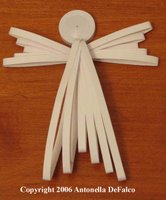
On the 11th Day of Quilling we made a Spreuer Angel.

If you need help, please click for Spreuer Instructions. Please note: I was trying different things when I was trying out how to Spreuer, and for this project I worked from right --> left, and that will be reflected in the numbers I give you.

For this Angel, we do the following:
Wings (make 2 of these)
Wrap your strip, right --> left
Start 8 - 7 - 6 - 7 - 8 End
1 - 3 inch (7.62 cm) coil heart, attach to wing

Bodice (only 1 of these)
Wrap your strip, right --> left
Start 15 - 14 - 13 - 12 - 13 - 14 - 15 End
2 - 3 inch (7.62 cm) S-scrolls to make a Kissing S-scroll, attach to top of bodice

For her face
1 - 24 inch (60.96 cm) tight coil
1 - red and 1 - green approximate 3 inch (7.62 cm) each strip
Start by wrapping the red and green in Spiral shape together, approx 3/4 of the way
For remaining 1/4 of the way Spiral individually
Attach to top of tight coil
Attach face to bodice and wings

Please use picture for placement and guidance. I have also provided a picture before the decorative elements were placed for assistance.
spreuer angel

Enjoy!
Copyright Antonella DeFalco

Technorati Tags: , , , ,, , , , ,

Monday, December 11, 2006

On the 10th Day of Quilling - Spreuer Instructions


I purchased my onion holder several months ago and have not used it. Since this is a month of trying new things, I thought it was time that I attempted to do some Spreuer work.

Before we can begin with projects, this post will help you with the basic instructions.

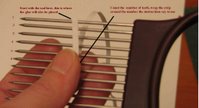
Begin with your onion holder tool. You will see that each tool could have a different number of teeth. The tool I have has 15 teeth, as shown.


To make your spreuer item, follow these basic steps, the pictures will help:
  • Take your strip and with the loose end at the 1st tooth, count down to the number specified in the instructions.
  • With Spreuer, the instructions will provide you with a list of numbers.
  • These numbers correspond to the teeth on your tool.
  • When you get to the number you wrap the strip around that tooth.
  • As you come around the back and over the top, place a dab of glue.
  • If you need more than one strip, I do not glue the 2 together when I start. I wait to see where the strip will end and then cut and glue so that I keep a front and back where all my glue will be.
  • Keep winding until you complete the project.
  • When you are done, glue the final wrapped strip in place and slide it off the tool.
  • Arrange your spreuer items accordingly.

With Spreuer you can make Crosses, Angels, Flowers, Trees... stay tuned to see what we will make :-)

This will get you started. The next few projects will show you some examples.

Enjoy!
Copyright Antonella DeFalco

Technorati Tags: , , , , , , , ,

On the 9th Day of Quilling - Fancy Ornament


A Quilled Christmas Ornament from Antonella at www.quilling.blogspot.com  #Quilled #Quilling #Ornament #Christmas


On the 9th Day of Quilling we made a fancy ornament. Tried to keep this one simple, with mostly loose coil shapes.

To make this project you will need:
  • 4 - 3 inch (7.62 cm) green teardrops
  • 5 - 3 inch (7.62 cm) white teardrops
  • 1 - 3 inch (7.62 cm) red teardrop
  • 3 - 3 inch (7.62 cm) red diamond
  • 5 - 3 inch (7.62 cm) red loose coils
  • 11 - 3 inch (7.62 cm) green loose coils
  • 7 - 3 inch (7.62 cm) white loose coils

When making the ornament, please refer to the picture. Starting at the top and working or way down, do the following:
To make the flower:
  • Place red loose coil and place 5 white teardrops (rounded end glued to red loose coil) to make a star shape.
  • Place 4 green teardrops between white teardrops (pointed end glued to red loose coil)
  • Glue 1 red loose coil to the top of the flower


A Quilled Christmas Ornament from Antonella at www.quilling.blogspot.com  #Quilled #Quilling #Ornament #Christmas

Bottom:
  • Row 1 - Glue 3 green and 3 white loose coils, alternating colors
  • Row 2 - Glue 4 green and 2 white loose coils, alternating colors
  • Row 3 - 4 green loose coils
  • Row 4 - 3 red loose coils
  • Row 5 - 2 white loose coils
  • Row 6 - 1 red teardrop, glue rounded end to row 5


To attach the top and bottom use the 3 red diamond shapes to attach them as shown in the picture.

I hope you like this project.

Enjoy!
Copyright Antonella DeFalco

Technorati Tags: , , , , , , , ,

Friday, December 08, 2006

On the 8th Day of Quilling - Poinsettia


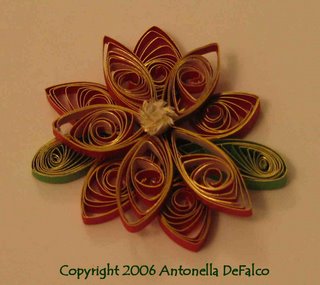
On the 8th day of quilling we made a gilded poinsettia.

The more I use this beautiful gilded paper, the more I love using it. Look at how it adds pop to this poinsettia. This project layers the leaves and the center portion of the poinsettia.

To make this project you need the following:
Start with:
  • 5 - 9 inch ( cm) marquis
  • Place them so that all the points meet in the center

On top of this, layer the following:
  • 5 - red and white marquis
  • 5 - 3 inch white
  • 5 - 6 inch (15.24 cm) red
  • Place the white strip inside the red strip and roll them together. For this project I did not glue the two strips together.

at the very top add
  • 1 - 3 inch (7.62 cm) fringed flower

For the leaves I used
  • 2 - 9 inch ( cm) teardrops
  • Place them where you want. The green adds a nice dash of color.

These are great to adorn your cards, or perhaps turn them into an ornament and hang them from the tree.

Enjoy!
Copyright Antonella DeFalco

Technorati Tags: , , , , , , , , ,

Thursday, December 07, 2006

On the Seventh Day of Quilling - Heartthrob Snowman


On the Seventh Day of Quilling we made a Hearthtrhob Snowman. This little guy is ready to go out for a night on the town.

The best part is that anyone can make him.

For the snowman, I used the following:
  • 1 - 18 inch (45.72 cm) loose coil for his head
  • 1 - 24 inch (60.96 cm) loose coil for his center
  • 1 - 36 inch (91.44 cm) loose coil for his bottom

His hat is made with:
  • 1 - 24 inch (60.96 cm) rectangle (the top is more round)
  • 1 - 12 inch (30.48 cm) rectangle for the rim of his hat
  • 2 - 6 inch (15.24 cm) coil hearts added to the hat

For his face:
  • 2 - 2 inch tight coils for his eyes
  • 1 - 3 inch (7.62 cm) long triangle for his nose
  • 3 - 1 inch ( ) tight coil for his mouth

Additional embellishments:
  • 3 - 3 inch (7.62 cm) tight coils for his buttons
  • 1 - 6 inch (15.24 cm) strip fashioned like a scarf
  • 1 - 3 inch (7.62 cm) coil heart attached to the scarf

And there you have it, ready for a night on the town!

Enjoy!
Copyright Antonella DeFalco

Technorati Tags: , , , , , , , , ,

Wednesday, December 06, 2006

On the Sixth Day of Quilling - Birdhouse


On the Sixth Day of Quilling we made a Birdhouse. As I have mentioned earlier, I really like birdhouses and I love how you can use quilling to dress them up.

This project was especially fun. I have extended the scroll challenge and forced myself to look at them in new and unique ways... I hope you like the way I turned S-scrolls into a pair of love birds for this project.

For this Birdhouse, I started with creating the basic birdhouse shape by taking red paper and decorative scissors and did the following:
  • Cut a 1-/12 inch square for the base
  • Cut another 1-1/2 inch square and cut it in half at an angle to make a triangle for the roof
  • I then took a gel pen and made a dash-dot (-.-.-.) pattern around the outside edge. I did this so that it is easier to see the delineation between the roof and the base. This is a scrapbooking/cardmaking thing.
For the quilling, I used 1/8 inch (.3 cm) wide strips. The instructions for putting together the birdhouse are as follows:
Roof
1 Heart-T-Scroll

  • 1 - 4 inch (10.16 cm) heart scroll
  • 1 - 4 inch (10.16 cm) T-scroll
  • Place T-scroll inside heart-scroll to complete the shape. Glue to the roof.
Base
  • 1 - 3 inch (7.62 cm) coil heart, place between roof and base
  • 1 - 2 inch (5.08 cm) heart scroll, place beneath the love birds
S-Scroll Birds (make 2)
I bet you didn't think that you could make birds from S-scrolls - it is very easy, here is how you do it...
  • 1 - 3 inch (7.62 cm) S-scrolls
  • 1 - 3 inch (7.62 cm) double scroll with no hook (attach it to the bottom part of the S-scroll, it looks like feathers)
  • 1 - .5 inch (1.27 cm) folded for beak, attach to the top part of the S-scroll
  • Look at the picture to see how the pieces fit to get bird shape
  • Place these love birds so that they are facing each other, perhaps they are singing a love song to eachother
This project is simple and easy to make, remember to always stop and break your project down into your quilling shapes.

What I really love about this is that it is an instant ornament for the tree. I find that I like to use birdhouses for new homes or weddings, so if you know someone who recently bought a home or got married this is a great "1st Christmas" ornament for the tree or scrapbook page.

Enjoy!
Copyright Antonella DeFalco

Technorati Tags: , , , , , , , ,

Tuesday, December 05, 2006

On the Fifth Day of Quilling - Scroll Tree

free quilling christmas tree pattern


On the third day of quilling we will make a beautiful Scrolled Christmas Tree. I love to challenge myself to use a particular shape and today it is the scroll shape. Please refer to my previous Scroll and More Scroll shape instructions for making this tree.

For making this tree I used 1/8 inch (.3 cm) wide strips. For this design you will need the following number of strips:
1 Heart-T-Scroll
  • 1 - 3 inch (7.62 cm) heart scroll
  • 1 - 3 inch (7.62 cm) T-scroll

2 Kissing scrolls
  • 4 - 3 inch (7.62 cm) S-scrolls

Remaining branches
  • 6 - 3 inch (7.62 cm) S-scrolls
  • 6 - 3 inch (7.62 cm) double scrolls

Topper
  • 1 - 3 inch (7.62 cm) red diamond

Trunk
  • 1 - 3 inch (7.62 cm) red S-scroll

To put this tree together, I recommend the following:
  • Place the Heart-T-Scroll down first
  • Line up your 2 kissing scrolls next
  • To keep a straight line, it may be best to work over a piece of wax paper with graph paper underneath. Then you can use the straight lines to make sure your tree is straight.
Along the left side and then the right side, starting at the top, add the following:
  • S-scroll, pointing down
  • Double scroll, pointing up
  • S-scroll, pointing down
  • Double scroll, pointing up
  • Double scroll, pointing down
  • S-scroll, pointing down

See the picture for placement. You can then adorn the tree as in this example with pearls.
free quilling christmas tree pattern

Enjoy!
Copyright Antonella DeFalco

Technorati Tags: , , , , , , , ,

Monday, December 04, 2006

More Quilling Scroll Shape Instructions

The following are some additional Scroll shapes that you can make, they are:
  • Heart-T-Scroll
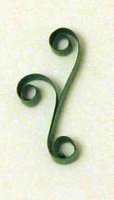
  • Double Scroll
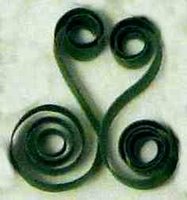
  • Kissing S-Scrolls
(at least that is what I call them)

I recommend that you use the pictures as a guide.

quilling heart t-scroll
Heart-T-Scroll - named because you place a T-scroll into a Heart-scroll.
  • T-Scroll - fold strip in half, glue bottom where fold is, roll the loose ends outward (away from each other). The resulting shape looks like a "T"
  • Heart Scroll - fold strip in half, roll the loose ends toward eachother.
  • For this design, place the T-Scroll in the center and roll the ends of the heart so that the "T" is taller than the heart.
  • To complete this shape, glue the bottom of the "T" to the point of the heart as shown in the picture

quilling double scroll
Double Scroll
  • Fold a strip of paper nearly in half and glue the end where the fold is.
  • Begin rolling the loose ends in the same direction such that one is shorter than the other.
  • Roll the glued end in the opposite direction. Use the picture for guidance.

quilling kissing s-scroll
Kissing S-Scrolls
  • Make 2 S-scrolls and place the scrolls so that they face eachother.
  • The result is a "heart" shape.

Enjoy!
Copyright Antonella DeFalco

Technorati Tags: , , , , , , , ,

Sunday, December 03, 2006

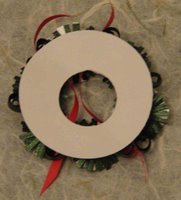
On the Third Day of Quilling - Winter Wreath

free quilling pattern advent wreath
On the third day of quilling we will make a Winter Wreath

In honor of Advent, I thought it appropriate to make a wreath. You can click on Fringed Flowers if you need help with making the flowers.

To start with, I punched a 1-1/2 inch (3.82 cm) circle and then cut the center out. Refer to the photo at the end of this post showing the back of the wreath. For the fringed flowers I used 3/8 inch (.95 cm) wide paper. The shine that you can see in the photos is from the metalic paper that I used.

free quilling pattern fringed flower
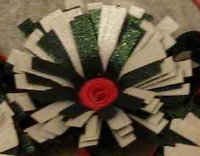
The fringed flower at the top of the wreath is made in the following way:
1 - 3 inch (7.62 cm) tight coil
1 - 3 inch (7.62 cm) White fringed strip
1 - 4 inch (10.16 cm) Green fringed strip
Glue the white and green fringed strips together at one end. At the end that is glued together, glue it to the red strip. Beginning with the red, roll the paper, keeping it tight and gluing it together.
After the glue has dried, place the flower on a hard surface and gently push down on the fringe so that they are

free quilling pattern fringed flower
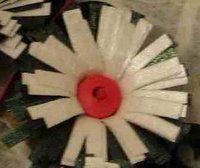
The remaining 5 flowers are arranged around the wreath and are made in the following way:
1 - 3 inch (7.62 cm) tight coil
1 - 2 inch (5.08 cm) White fringed strip
1 - 3 inch (7.62 cm) Green fringed strip
Glue the red, white and green strips together end-to-end Beginning with the red, roll the paper, keeping it tight and gluing it together.
After the glue has dried, place the flower on a hard surface and gently push down on the fringe so that they are spread out as shown.

To fill in the wreath, I did the following:
8 or more - 3 inch (7.62 cm) teardrops that are placed between the fringed flowers to fill in the design.
1 - 3 inch (7.62 cm) heart, see photo for placement
2 - 3 inch (7.62 cm) curled strips (see photo). Cut the ends at an angle, and weave through the wreath for added color

free quilling pattern advent wreath


Enjoy!

Copyright Antonella DeFalco

Technorati Tags: , , , , , , , ,

How to Make Fringed Flowers

fringed flower quillingFor many of my designs, I like to use Fringed Flowers. Early on in my quilling, I found that I liked these flowers. It may have been because they look difficult, however they are easier than they appear.

If you are unsure how to make fringed flowers these instructions are for you. For more information about Fringed Flowers also check out the Basics of Fringe Design and detailed instructions for making fringed flowers. I have included more pictures of fringed flowers so that you can see the effect of using different widths and angles in your cuts.


The important thing to remember with fringed flowers is that the width of the paper that you use is not important. You can use 1/8 in (.3cm), 1/2 in (1.27 cm), 3/8 inch (.95 cm) or any size in between or wider. The difference is in the size of the flower. When deciding what width paper to use, think about the size of your pattern or item that you are quilling and select a width that is in proportion to your project size. The various photos that I have shared show you how different each quilled flower can look. The possibilities are endless.

There are machines called "fringers" that will fringe your paper for you. I do not use one, instead I hand fringe my strips. These instructions are provided for those of you who are hand fringing your paper.

The tools that I use are small scissors (these can be craft scissors, nail scissors, or childrens scissors). I recommend something that has a nice sharp cut. Since many of you have nail scissors, start with those. If you are a paper piecer, then you already have the appropriate tools.
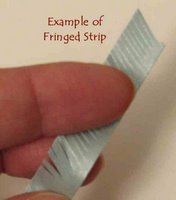
fringed flower quillingTo start, take your scissors and cut tiny cuts approximately 3/4 of the way through the width of the strip. It looks something like this ||||||||||||||||||||||||, please refer to the picture for a close up of an actual fringed strip. The closer (or thinner) you make your cuts, the more delicate the flower will look.
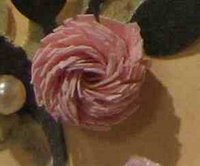
fringed flower quilling
After you have cut your strip, you can begin making your coil. Referring to this picture, if you start your coil using the strip that has been cut, your flower will look like this. For this flower, I did not press the fringed pieces down. They naturally lined up this way because I cut my fringes at a slight angle.
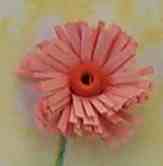
fringed flower quillingIf instead, you add a strip of uncut paper and glue it to your fringed strip and begin rolling from the uncut paper, it will look like this picture. You may prefer this look or you may make your flowers this way because it is easier to start with the uncut strip, in this case a 1/8 inch (.3 cm) width paper, and make a tight coil at the beginning. This makes rolling the fringed strip which is glued to the uncut paper easier. Once you have rolled and glued the strips and the glue has dried, place the flower on a hard surface and gently press down on the fringes and flatten them as shown in this picture. You can also take your needle tool or a pin and slightly curve the ends for a more rounded look.

One of my favorite things to do is to add little pearls in the center of my fringed flowers. I think it adds that bit of charm to the overall appearance.

For more information about Fringed Flowers check out the Basics of Fringe Design and instructions for making fringed flowers.


fringed flower quillingEnjoy!

Copyright Antonella DeFalco


Technorati Tags: , , , , , , ,

Days of December Quilling

Happy Holidays! As my special treat in December I am posting a "Quilling A Day" until the 25th of December.

If you are new to quilling,
please click to learn the basics of quilling and to learn to make the basic quilled shapes that are assumed you know how to do in creating many of these designs.

The designs will be predominantly focused around the Holidays and I will attempt to make something for everyone. Please check back here for the list of items that have been done so far:

  • Day 1 - Loose Coil Christmas Tree - very easy Christmas Tree design, can be done by children and adults alike.
  • Day 2 - Birdhouse of Love - combines paper piecing with quilling to create a one-of-a-kind winter white and green birdhouse.
  • Day 3 - Winter Wreath - in the spirit of Advent, I have created a wreath to share. This design uses fringed flowers.
  • Day 4 - More Scroll Shapes - I describe the Heart-T-Scroll, double scroll, and Kissing S-Scroll shapes. These are shapes that you will need for the next few days of projects.
  • Day 5 - Scroll Christmas Tree - I love the look of this tree. It is made using S-scrolls, a Heart-T-Scroll, double scrolls and kissing s-scrolls. This project will be available for a limited time.
  • Day 6 - Love Bird Birdhouse - This one has a new design of mine, my S-scroll love birds, check them out.
  • Day 7 - Heart throb Snowman - This guy is all dressed up and ready for a night on the town
  • Day 8 - Gilded Poinsettia - this gilded paper makes this poinsettia breath taking
  • Day 9 - Fancy Ornament - this is a small ornament for your scrapbook Christmas layout, or Christmas cards, or possibly for your tree
  • Day 10 - Spreuer Instructions - you've heard about it, now you can see what it is all about
  • Day 11 - Spreuer Angel - A sweet Christmas Angel using the Spreuer technique
  • Day 12 - Spreuer Cross - A lovely Cross using the Spreuer technique
  • Day 13 - Triangle Christmas Trees - basic design, using triangle shaped coils to make trees
  • Day 14 - Spreuer Tree - a very clean, basic Spreuer tree with lights and a star on top
You can find more Free Patterns if you are interested. As always, send me comments with ideas or suggestions for information, tips, or patterns that you would like to see.

Important note: These items will remain posted until after the holidays, at that time, I may take some of the free instructions that have been posted and remove them.


Technorati Tags: , , , , , , ,

Enjoy!

Copyright Antonella DeFalco

Saturday, December 02, 2006

On the Second Day of Quilling

free quilled birdhouse pattern quilling
On the second day of quilling we Adorned a Birdhouse.

This will not be the only birdhouse that we see during this Quilling month of December.

For this Birdhouse, I started with creating the basic birdhouse shape by taking green paper and decorative scissors and did the following:
  • Cut a 1-/12 inch square for the base
  • Cut another 1-1/2 inch square and cut it in half at an angle to make a triangle for the roof
  • I then took a gel pen and made a dash-dot (-.-.-.) pattern around the outside edge. I did this so that it is easier to see the delineation between the roof and the base.

I had some new English quilling paper that has a beautiful gilded edge. I love it, it is so beautiful and I will tell you that the pictures don't do it justice.

The next step is to make quilling to adorn our new birdhouse. For this design, I used a shape called a "flag" that I have not previously described. Use this picture as your guide and do the following:
quilling shapes

  • Take your strip of quilling paper (width does not matter) and fold it in half length-wise
  • Do not glue the strip
  • Starting from the end that is open, start a coil
  • You only want to make a few turns and as you turn you will see the end where the fold is will start to push out, like a flag


The instructions for putting together the birdhouse are as follows:
Roof
  • 3 - 3 inch (7.62 cm) teardrops
  • 1 - 3 inch (7.62 cm) flag
  • Arrange the 3 teardrops with points glued together and attach flag to the glued points
  • 2 - 3 inch (7.62 cm) S-scrolls are added for additional decoration
Base
  • 1 - 9 inch (22.86 cm) tight coil
  • 4 - 3 inch (7.62 cm) heart scrolls
  • Arrange as shown in picture
This would look great on a card or if you add a hook you can make it an ornament to hang on your tree.

Technorati Tags: , , , , , , , ,


Enjoy!

Copyright Antonella DeFalco

Friday, December 01, 2006

On the First Day of Quilling

Welcome to our First Quilling Pattern!

For today's quilling we will make your basic open coil Christmas tree. This is a staple that everyone should know how to make because it is so simple and quick to make that if you needed to make a quick Christmas card in a pinch, this is probably what you put on it.

I decided that green Christmas trees are overrated, so today we will make some neat red trees.

The tree itself is made with 10 open coils. You make the open coil by winding your paper and then releasing it when you get to the end of the strip. It is an open coil because you do not glue the end. This is a picture so that you can see what it looks like.
free pattern quilling open coil

I like working with 3 inch (7.62 cm) strips. The reality is that you can use any size strip you would like. You can make the tree smaller or larger by changing the strip length or by adding more rows of open coils. In the basic design I am sharing with you today, I selected a 4 row tree with the following:
  • Row 1 (top) - 1 open coil
  • Row 2 - 2 open coils
  • Row 3 - 4 open coils
  • Row 4 (bottom) - 5 open coils

You simply add one more coil than the previous row for each new row you add. Here is a picture of the basic tree.
free pattern quilling quilled christmas tree

In this first tree that I made, you will see that I tore the ends. Although this is perfectly acceptable, I find that when using open coils I like a more clean look. You will see in the additional pictures, I have created trees where I have cut the end at an angle.

The two additional trees that I have included, have some finishing touches added to them.
free pattern quilling quilled christmas tree


You will see that I started with the Open Coil Christmas Tree instructions above. To this tree I have added the following:
  • 1 - Diamond Star - 3 inch (7.62 cm) Diamond
For the trunk of the tree I have used
  • 1 - 3 inch (7.62 cm) V-Scroll
  • 1 - 3 inch (7.62 cm) S-Scroll

For those of you visiting for the first time, you can find the instructions for the Coil and Scroll shapes by clicking the links.


Here is a picture of the Christmas Tree I added to my Christmas cards last year.
free pattern quilling quilled christmas tree
A word of advice. The open scrolls are quite delicate when mailing. The open end will get squished unless you carefully package it. This is why I usually hand deliver my quilled cards, but on those occasions I have to mail them this is what I try to do. I buy a padded envelope (or use bubble wrap). I take 2 pieces of cardboard, one for the top and bottom to stabilize the card so it doesn't bend in the mail. I then will make at least 4 tight coils. It is important that the width of these tight coils is bigger than the height of your quilled piece. I then place one piece of cardboard on the back of the card. For the piece on the front, I glue the tight coils to the other piece of cardboard, taking care to align it so that it does not touch my quilled design. I then place this in the envelope and mail it. I take this special care particularly if I have made something that is more delicate, like these open coils or fringed flowers.

Have fun with this, and remember to experiment!

Technorati Tags: , , , , , , , ,


Enjoy!

Copyright Antonella DeFalco

Thursday, November 30, 2006

25 Quillings 'til Christmas

25 Quilled Crafts til Christmas

I decided to try something fun this year. With the Holidays approaching I wanted to attempt to do a "Craft a Day until Christmas," a bit like an online version of an Advent Calendar where each day we open a new craft or quilling tutorial.

This is a fun activity where there will be a bit of experimentation and lots to share. How this will work is that every day between now and Christmas, I will share with each of you a quilled craft or technique. Some of the items will be standalone quilled items and other will be what I call “adornment quilling”. Adornment quilling is when take an item such as a box, ornament, or paper item and we add quilling. The quilling truly enhances the item and embellishes the item. In my opinion, this is the essence of quilling. This is my favorite way to quill, so I think you will see a lot of it over the next few weeks.

This will be a very challenging few weeks for me, since I don’t yet know what I will be crafting. I hope that my creativity finds the time to construct that which is in my mind’s eye. These are my initial thoughts about the types of projects that we will see over the next few weeks:

  • A birdhouse or two because I love them
  • Perhaps a few days of different trees and wreaths
  • I have some paper that I purchased for Christmas and weddings that has a gilded edge that I will have to incorporate in a few of the projects
  • I know that some of the projects will have fringed flowers, so I will be certain to share the instructions for how to make them with you
  • I have always wanted to try a technique called Spreuer, so I am thinking of sharing the instructions for how to do it and perhaps make an angel and a cross
  • Perhaps I will also share an origami reindeer that I made last year?
  • I am fascinated with colors, so we will have some red trees, perhaps a black and white design
  • Oh, one last thing, I have been dreaming of a white Christmas so don’t be surprised if some of the items are white with a splash of color,

Oh boy, I just cannot wait to get started! Let's have some fun!

Important note: Each day I will provide the instructions for the specific quilled item. These items will remain posted until after the holidays, at that time, I may take some of the daily quilled crafts and remove the instructions.
Technorati Tags: , , , , , ,

Copyright Antonella DeFalco

Friday, November 24, 2006

Black Friday and Quilling

For those of you who have decided to venture out and make purchases, best of luck on the busiest shopping day of the year. For those of us who have decided to stay inside and surf the net, I have a great thought.....

For those crafters on your shopping list, how about this: Quilling Pattern-A-Day 2007 calendar?


It is jam packed with free patterns for every day of the year and is perfect for anyone who loves to make cards, scrapbooks, or any of the paper crafts. The possibilities are endless.

Best of all, you get the basic slotted quilling tool and all the paper strips you need to make each project. If you are a teacher looking for ideas you have an entire year worth of ideas. Looking for something to do with the kids, quilling is an easy craft that everyone can do together.

C'mon, give it a try!
Enjoy!
Antonella
:-)

Wednesday, November 22, 2006

Happy Thanksgiving 2006

free quilling pattern thanksgiving turkey
Thanksgiving2006
Originally uploaded by AntonellaD.

For those of us in the states, I wanted to take this opportunity tp share with everyone Warm wishes for a Happy Thanksgiving!

I wanted to try something new. This was a quick and easy project for you to try. You can see that I picked a variety of colored strips to make this little guy very colorful (and I must admit, the really fun part was picking the colors) :-)

  • 10 - 24 inch (60.96 cm) strips - variety of colors
  • 1 - 12 inch (30.48 cm) brown teardrop for his head
  • 1 - 6 inch (15.24 cm) black triangle for beak
  • 1 - 3 inch (7.62 cm) red spiral for the piece that hangs down


For making the body and the feathers, I rolled all 10 strips at the same time keeping them as tight as possible.

I rolled them unti there was approximately 6 - 9 inches (15.24 - 22.86 cm) free. I glued the end and held it until it dried.

I did this so that I could then take the lose ends and create loose coils at the ends. I coiled them in various directions to fill in the "feathers".

I hope you give this a try, it was a lot of fun to make. Now I need to figure out how to do feet! :-)

Gobble, gobble!

Technorati Tags: , , , , , ,

Copyright Antonella DeFalco

Sunday, November 19, 2006

Free Quilling Pattern New Home

free quilling pattern birdhouse fringed flowers magnet
As you know, I love birdhouses. I try to come up with new ways to incorporate them into my crafts. This is a magnet that I attached to a card for my sister and her family when they moved into their new home. This is a bit of a change for me in that I haven't done too many magnets and I tried to select brighter colors.
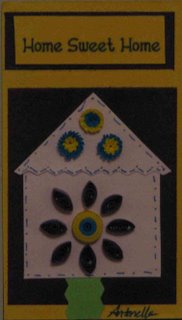
If you would like to give this a try, here are the instructions:

I started with a 1-1/2 in (3.81 cm) square and added a triangle on top to complete the house

Regarding the quilling, I did the following:

Fringed flowers (all 3 were made the following way):

I used 1/8 in (.3cm) wide paper. For the fringing, I took small scissors and cut tiny cuts approximately 3/4 of the way through the width of the strip. It looks something like this ||||||||||||||||||||||||

  • 3 inch (7.62 cm) - center of flower
  • 4 inch (10.16 cm) - outside of flower
For each flower, I glued the 2 strips together and tightly rolled them. I glued the end. When the glue dried, I placed the fringed flower on the table and using my fingers gently spread the fringes to create the flowers shown.

For the large central flower, I did the following:
  • 8 - 4 inch (10.16 cm) marquise shapes
  • 3 inch (7.62 cm) plus 6 inch (15.24 cm) tight roll. Similar to the fringed flowers, I glued to two colored strips together before rolling them into a tight roll.
I then arranged them as shown.

I like small projects like this because it allows me to play a little with some of my smaller pieces that are left over from other projects. Experiment with your quilling because it is so much fun to do!

I hope you enjoy this little pattern and that I have inspired you to try something similar.

Love Unconditionally, Laugh Uncontrollably, and Live Unexpectedly Free!
Technorati Tags: , , , , , ,

Copyright Antonella DeFalco

Saturday, November 11, 2006

Veterans Day


Today is November 11th. In the United States this is Veterans Day. Veterans Day is always on November 11th. This day was chosen because on the 11th hour of the 11th day in the 11th month World War I ended (November 11, 1918 at 11:00 am). Every year at that time, the President of the United States places a wreath on the Tomb of the Unknowns at Arlington National Cemetery.

I did not want to let today pass without taking a moment to remember all of those men and women who have served and those who have given their lives. So many have served their country and given their lives. For those who have survived and returned I say "Welcome Home and Thank You"

For those who have given the ultimate sacrifice, I say "God Bless you and Thank You for keepting us safe."

These little Patriotic Love Birds are my very small gesture to all of you brave souls.

Technorati Tags: , , ,

Tuesday, October 31, 2006

Happy Halloween


Happy Halloween Everyone!

Tonight we went Trick-or-Treating. It was a great night, the weather was so mild. We went around with a few of the neighbors, left our candy out on the porch and walked around for over an hour. It was a great night!

One last thing before we part, a quick little song my son learned in school.

One Little, Two Little, Three Little Witches
Fly over haystacks, fly over ditches,
Slide down the moonbeams without any hitches
Heigh Ho! Halloween is Here!

Tricks and Treats!

Saturday, October 28, 2006

Quilled Butterfly - Free Pattern

free quilling pattern butterfly
Hello Everyone,

A friend of mine was asking for instructions to make a butterfly and I sent her a photo and instructions and thought that it would be a great addition to this site. Just in case you have not visited before, here are links to the Basic Coil Shapes and Spiral Shapes.

The butterfly that I have attached is red and pink - she was specifically requested. I have not identified the specific colors you would use because you can make your butterfly any colors you would like. I have used 1/8" (.3cm) width strips. Have fun with it and feel free to ask any questions you may have:

Body
  • 1 - 3" (7.62 cm) tight coil (for the head)
  • 1 - 6" (15.2 cm) Marquise (for her body)
  • 1 - 4" (10.2 cm) Teardrop (For this butterfly I made it flat on one side - I do a lot of work by "feeling" my way around, ant thought that flat looked better for this particular butterfly)
  • 1 - 1-1/2" strip cut in half for the feelers (I usually cut almost to the end and glue the end to the head)
When I refer to wings I think of the "Top" and "Bottom" of a single wing. If you look closely, you will see that I wrap a strip around each of these separately. I do this because I think it makes the final piece more finished and helps with getting the wing in the shape I want for the project.

Top Wing
  • 7 - 4" (10.2 cm) Teardrops (I make this the darker color and arrange them on the outside)
  • For the multi-colored center point I take 2 different color strips one 3", I coil this tightly with the second 6" strip glued to the end. When I coil the 3" tight coil I glue it before I continue with the outside color.
  • 5 - 6" (15.2 cm) Marquise
  • 2 - 4" (10.2 cm) Marquise
  • I may add or take away coils based on how I want it to look and how the coils fit together. As I mentioned, by adding the strip on the outside and gluing it, it gives me another opportunity to get the wing shape better.
Bottom Wing
  • 7 - 4" (10.2 cm) Teardrops (I make this the darker color and arrange them on the outside)
  • I added a little more color by adding a 4" marquise in a different color
  • 2 - 6" (15.2 cm) Marquise
  • 1 - 6" (15.2 cm) Triangle (to get the wing shape - you may not need this)
  • 2 - 4" (10.2 cm) Marquise
  • Again, I may add or take away coils based on how I want it to look and how the coils fit together. By adding the strip on the outside and gluing it, it gives me another opportunity to get the wing shape better.
  • One final thing on this bottom wing, I added a 4" (10.2 cm) Teardrop to the outside. Many of the pictures of butterflies show that they have what I refer to as a little extra wing. I do not know what to call it, but they have such beautiful shapes to their wings and this was an attempt to capture some of that.
You can take this picture, print it out and place wax paper over it. You can then quill directly over the wax paper for placement of the coils. You can either make 2 of each of the wings and arrange a butterfly in flight, or you can do what I have done here which is use a coil (in this case I used a 4" / 10.2 cm tight coil) and placed it behind the top wing to lift it off the page thereby adding dimension.

I hope that you have enjoyed this butterfly.

Technorati Tags: , , , , , ,

Copyright Antonella DeFalco

Sunday, September 17, 2006

Blogging and Some Cleanup

Inspiration! New Ideas, and Spring Cleaning in the Fall...

I have been inspired. This inspiration is driven by my need to find organization. My current inspiration has been about how I would like this site to move forward.

This site has a lot of information about quilling and tools and techniques that can be found within my Quilling Blog. The reason for trying to organize this information is that I have found that it is not easy to find unless you know where it is. Since many people who visit are new to the site, they may not know where to look. So, I have undertaken a huge effort (at least on my part since I am not a webmaster) to reorganize this website and make finding the information much easier.

I am adding some links on the Left Sidebar for the following items:
  • Quilling Information - - This is all about this site. I am organizing my information so that you will be able to easily find things like instructions for making the Quilling Shapes and links to the Free Patterns.
  • Artist Spotlights - This is a monthly series where I select an artist in various genres and share them and their work with you. As I add new articles, I will post a link here so that you can easily find your favorite artist!
  • Blogs I Read - The web is a fun place, find about some of the neat blogs I like to read.
  • Subscribe Here - If you would like to be notified of changes to this blog you can get updates every time I add new content. You can get email updates by entering your email address (don't forget to reply to the email FeedBurner will send you so that you can complete the transaction) or you can receive an RSS feed by clicking on the orange RSS button. If you have a Google Home Page you can click on the Add to Google button.
  • Recent Posts - A list of the last 10 posts that I have made
  • Archives - A link for each month that I have added information to this site. Please click on the month to see everything for that month.
I sincerely hope that making these changes will help make finding the information you are looking for easier to find. You will see several posts today as I create additional posts that will help with this organization process.

Please comment on this post or send me an email if you have any suggestions or ideas.

Thank you,
Antonella :-)

Technorati Tags: , , , , ,

Copyright Antonella DeFalco

Free Quilling Patterns

I have been adding Free Quilling Patterns to this site so that everyone can see how easy quilling is. These patterns are free for personal use. You can use them in any non-commercial way. You may not represent these patterns as your own nor sell them commercially. If you would like to use these patterns or sell them, please contact me and we can discuss your specific details.

Please click to learn the basics of quilling and to learn to make the quilled shapes.

Beginner Patterns (these patterns use only the basic coil and spiral shapes):


  • 7 Petal Daisy - This is your basic Daisy pattern, quick and easy. A classic quilled design.
  • 4 Daisy Patterns - In this post, I provide photo and instructions for 4 basic daisy patterns.
  • Daisy Pattern - yet another daisy pattern. This one is shown on a card to demonstrate how you can combine quilling with card making.
  • Turkey Pattern - this uses simple techniques, but was something new for me. A bit of an abstract attempt.
  • Christmas Poinsettia - Here is a simple Quilled Christmas Poinsettia project. This is a classic that is perfect to add a string and make an ornament to hang on your tree!

  • These patterns use a variety of techniques and shapes and are fun to try:


    • Hot Air Balloon - Shows you how to use the fill-in technique to create a Hot Air Balloon
    • Wedding Cake - Uses fringed flower and alternate side looping techniques to create some really beautiful flowers that adorn a wedding cake. Suitable for a Wedding Card or as an embellishment on your scrapbook page.
    • Butterfly - This is an intermediate pattern that uses only the basic shapes.
    • Flowers of Love - This pattern uses S-scrolls to make a heart and accents this with white coil hearts. Lots of love for all of your Valentine's and Anniversary needs. This pattern was published in the Accord Quilling Calendar!
    • Lovey Dovey Birdhouse - This is a birdhouse pattern - very bright and springy.
    • Palm Tree and Sunshine - This is a very simple Palm Tree design. Perfect for that summer scrapbook page or a touch of humor for Christmas with Santa hanging out at the beach.
    • New Home Magnet - This is a great idea for a house warming gift.
    • Butterfly and Dogwoods - This is a perfect combination, a Spreuer Butterfly perched on a beautiful picture of a Pink Dogwood. This includes instructions and a link to the actual photograph so you can make the entire project on your own!
    • Easter Cross - This is a Spreuer Cross using the Patriarchal Cross design. It is augmented with delicate roses. Perfect design for Baptism, Weddings, Communions, Confirmations, Sympathy, or any religious gift or event.
    • Wedding Dress - A beautiful pattern of a Wedding Dress that is suitable for a scrapbook page, bridal shower, or wedding card. This pattern was published in the Accord Quilling Calendar!
    • Flower Girl Dress - This is a quick and easy pattern and can be used for a Flower Girl, Communion, Baptism, you name it. Just change the color and you can have any type of little girl event! This pattern was published in the Accord Quilling Calendar!
    • Red, White, and Blue Ladybug - Quick little ladybug for you to try. Remember, part of the fun is to play with the colors and make quilling truly your own. Here is the lady bug on a Sunburst flower too.
    • Pink Flamingo - this sweetie is made with roses and she is ready to fly away.
    • Happy Song Birds - this is a happy couple on a crackle painted background. The birds are perched on a branch enjoying the beautiful day.
    • Trellis with Yellow Flowers - Have you ever wanted to make a trellis and have flowers growing on the trellis, here is a simple pattern for you to try.
    • Flower Power Girl - This is a happy pattern inspired by my friend Toni, she literally leaps off the page.
    3D Quilling Patterns:

    • Spinning Top - This is made completely out of paper, including the spinning stick! Great idea for the kids.
    • Patriotic Spinning Top - Who knew a toothpick could be so useful. For tons of fun, try out this spinning top.

    Some Special Card Patterns:


    More Patterns and Techniques:
    Click here for my special December Days of Quilling series. I have several winter patterns that are fun and easy to make.

    Click here for Spreuer Free Patterns.

    Want to make ATCs (Artist Trading Cards)? Click here for a tutorial.


    Please send me a comment on this post or email me with any specific patterns you would like to see. There is a really good chance that I have the pattern or can make one for you.

    Technorati Tags: , , , , ,

    Copyright for Personal Use Antonella DeFalco